How to cast on stitches in knitting
In this article, I will describe two methods for casting on stitches with knitting needles: the classic “long tail” method and the provisional method using waste yarn (which is useful if you need to “open” and use the stitches of the first row later). Additionally, I will show how to determine the length of the yarn tail and demonstrate two ways to form the first stitch, highlighting their differences.
Let’s go through everything step by step.
Table of contents
Сhapter 1. Classic method. Determining the length of the tail
Сhapter 2. Forming the first stitch (twist-method and knot-method)
Сhapter 3. Classic cast-on method («long tail»)
Сhapter 4. Cast-on method using waste yarn (provisional cast-on)
Сhapter 5. Removing the waste yarn from the first row stitches
I. Classic cast-on method («long tail»)
Determining the length of the tail
This is a common cast-on technique described in various knitting guides as a basic method.
The essence of this method is that the stitches are cast on not from the end of the yarn, but after creating a certain length of yarn (the so-called “tail”). The length of this “tail” is usually the most debatable aspect of this technique. The length depends on the number of stitches needed, the thickness of the yarn, the size of the needles… As you can see, many factors determine the length of the “tail,” and it can often be challenging to calculate it accurately. If you need 10, 20, or even 30 stitches, estimating the length visually is not difficult. But what if you need to cast on 200 stitches? In any case, having an objective method for calculating it is useful.
There are many different methods: for example, the tail length should be four times the length of the edge of the future piece. But then you need to know the edge length of the future piece, which is not always possible. And that’s when the most effective method, in my opinion, comes to the rescue: you need to wrap the yarn around the needle that will be used for knitting as many times as the number of stitches you need. This method takes everything into account: the number of stitches, the thickness of the yarn, the size of the needles.
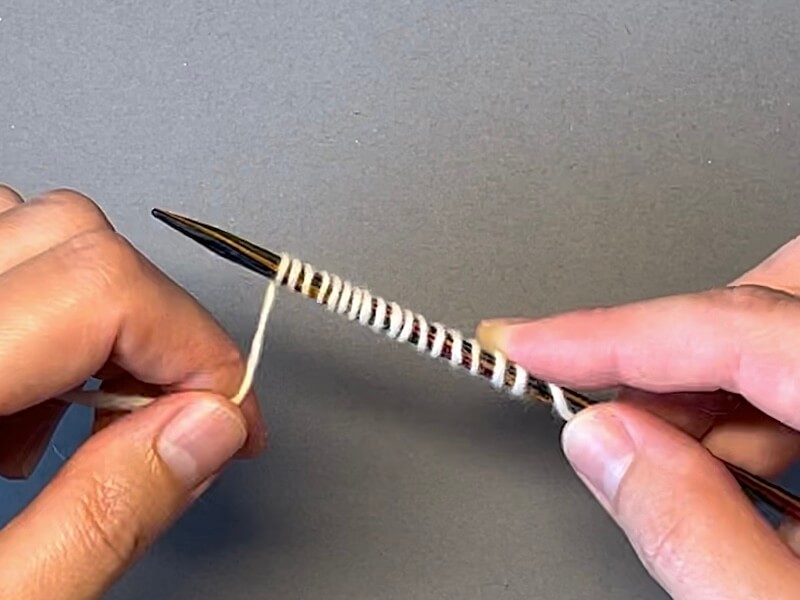
To determine the length of the “tail” for 80 stitches, you can wrap the yarn around the needle 80 times, or you can wrap it 20 times and use this length of yarn folded in four.
Forming the first stitch
After we determine the length of the “tail,” we need to create the first stitch. There are many methods for this as well.
1 method of forming the first stitch. The simplest and most versatile method, in my opinion, is the twist-method.
Place the “tail” closer to you, create a loop with a bend at the point where the “tail” transitions into the main part:
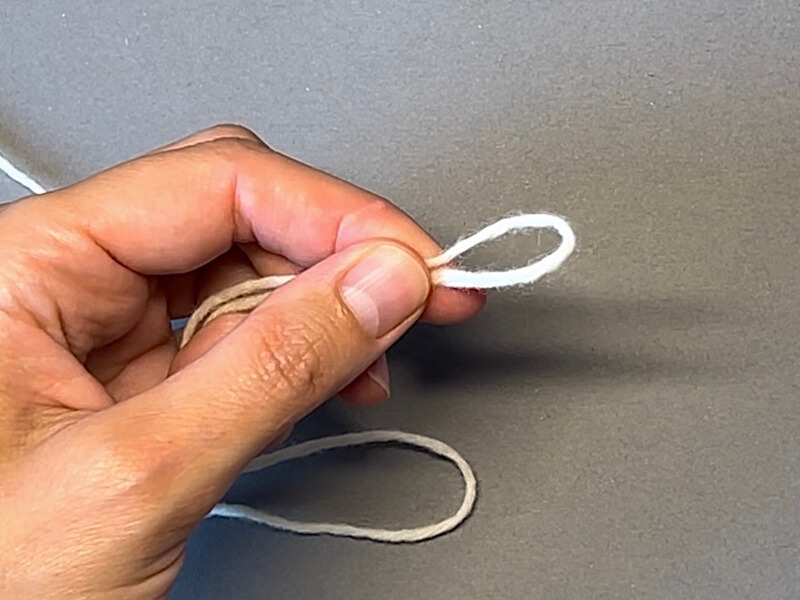
Insert the thumb and index finger of your left hand into this loop and spread the ends of the yarn forming the loop:
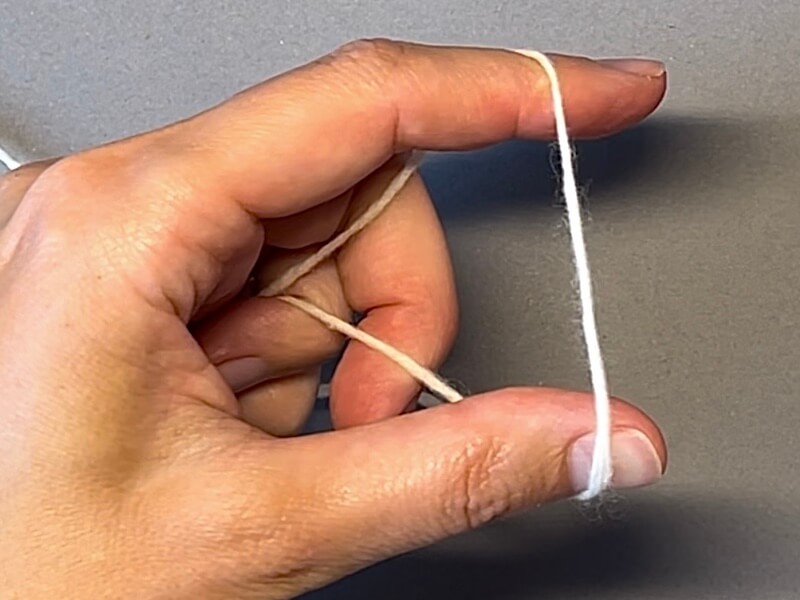
Then insert the needle into this loop from bottom to top:
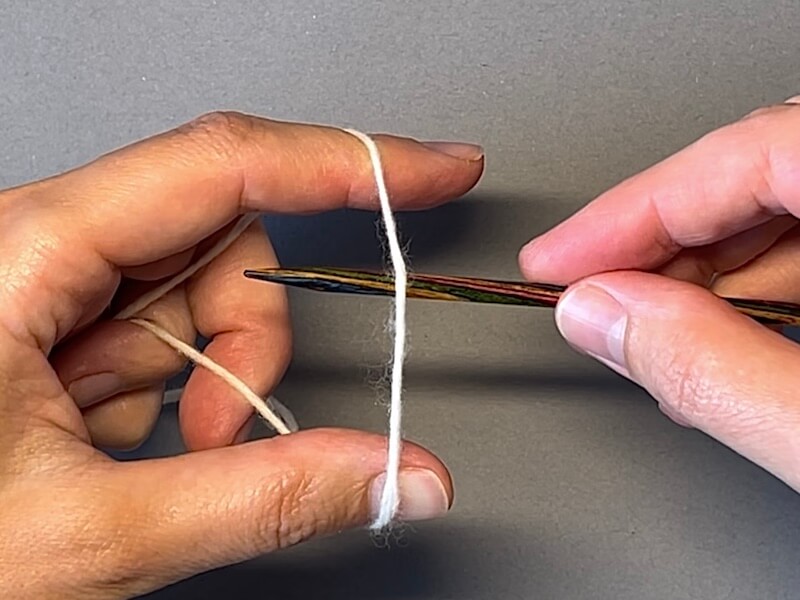
And make a circular motion, twisting the loop once:
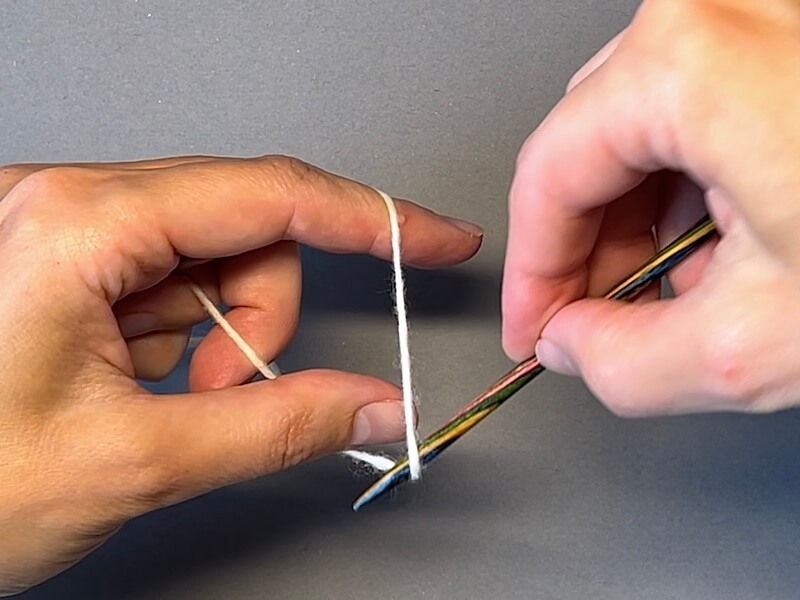
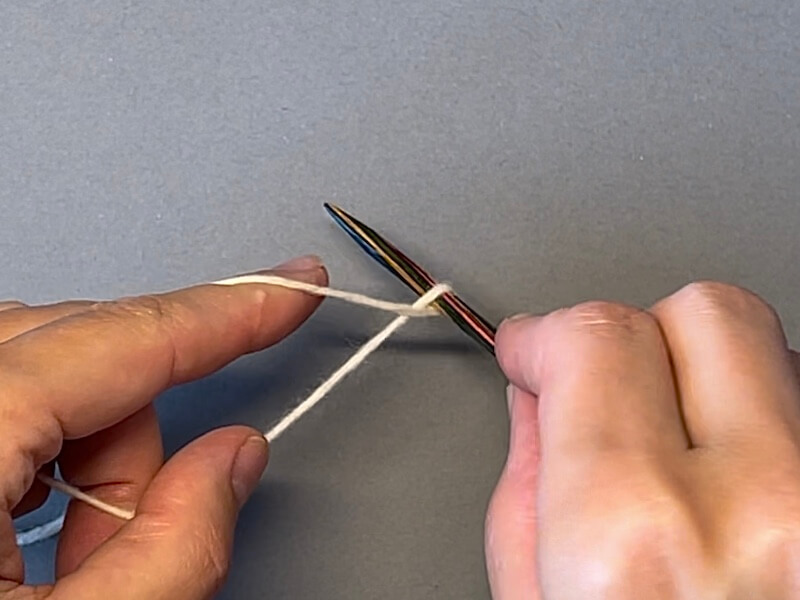
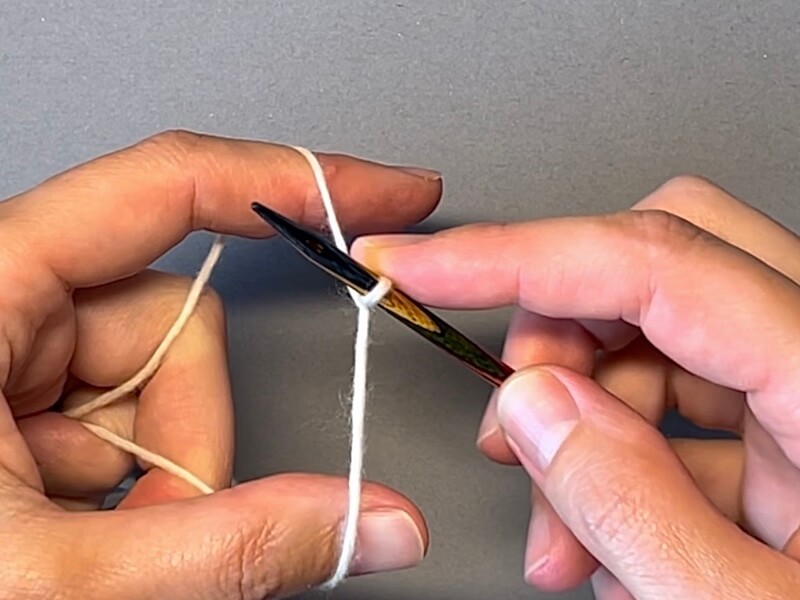
My grandmother 👵 taught me this method many years ago. She was an avid knitter and could do everything. I use it everywhere.
2 method of forming the first stitch. This method creates the first stitch with a knot. It is also used quite frequently.
This method forms the first stitch with a knot. Measure the expected length of the tail, and in this area, place the yarn away from you over your left index finger (with the “tail” towards you):
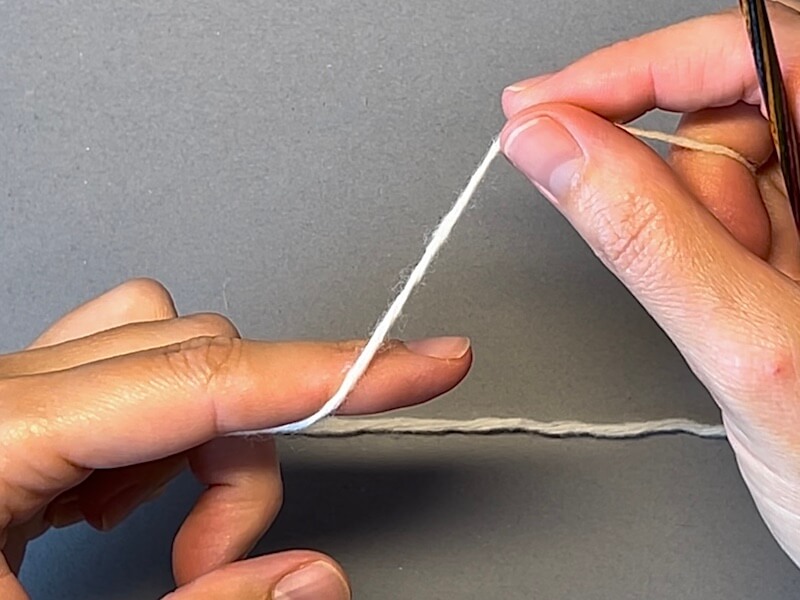
And wrap the yarn around your index finger once:
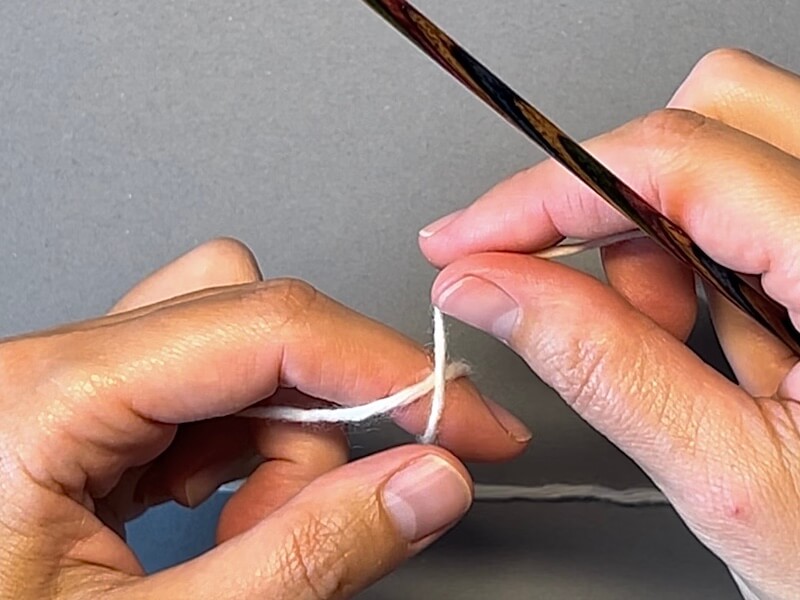
Then insert the needle under the yarn on your index finger:
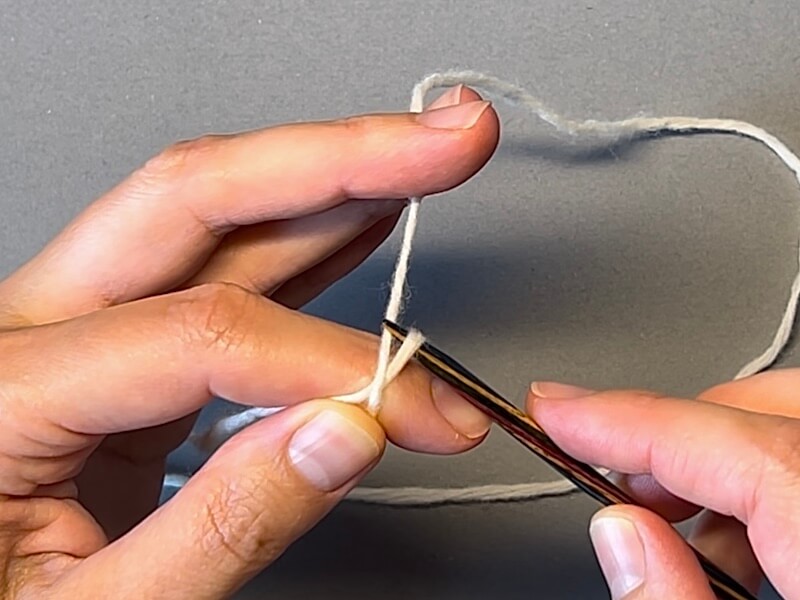
Grab the free part of the yarn,
and pull it under the yarn on your index finger:
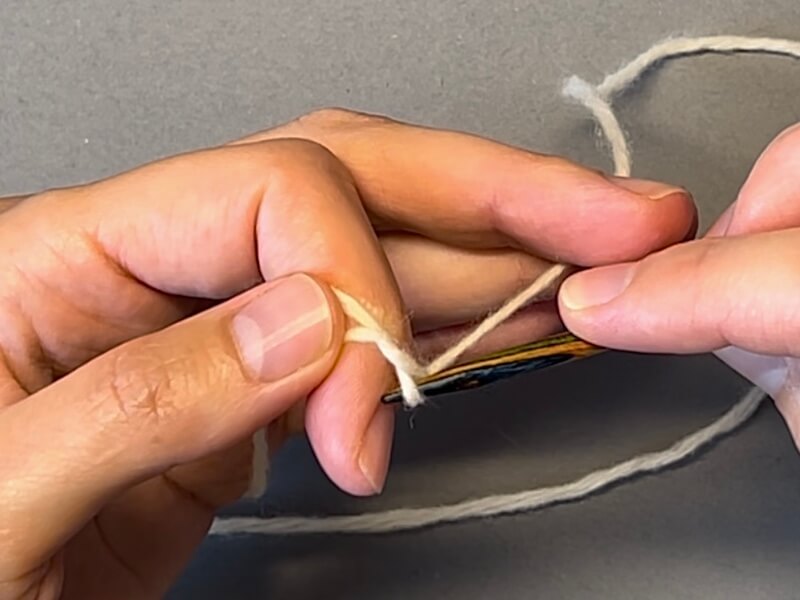
Tighten the resulting knot so that the first stitch
tightly wraps around the needle:
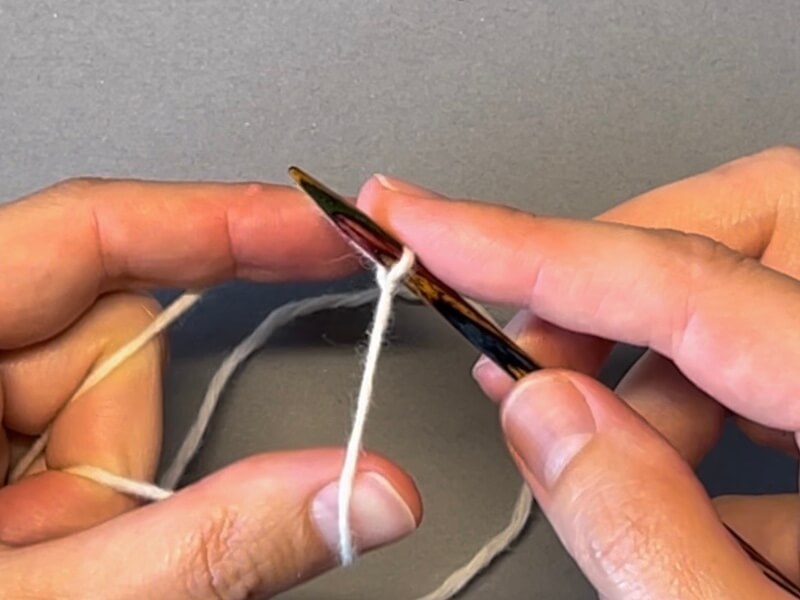
Classic cast-on method («long tail»)
Now that we have the first stitch, we will continue the classic cast-on using the thumb and index finger.
The positioning of the fingers is the same—the “tail” yarn lies on the thumb of your left hand, the main part of the yarn on the index finger of your left hand, with both yarns tensioned using the free fingers and palm of your left hand:
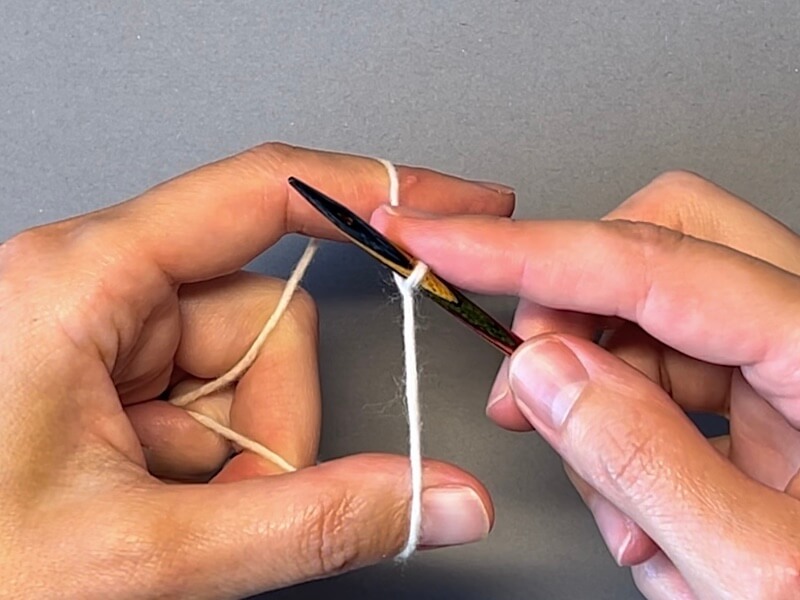
Raise your left thumb up:
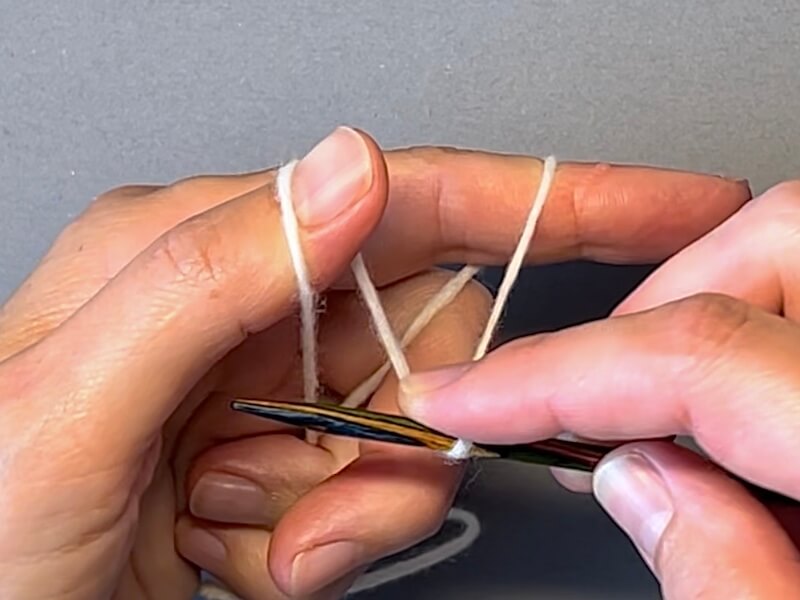
And insert the needle under the yarn in front of your thumb:
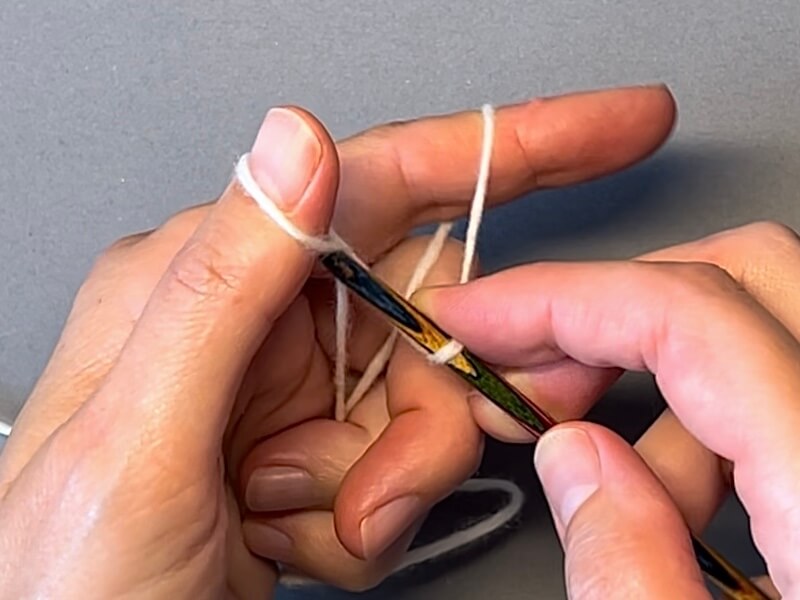
Continue the needle movement over the yarn behind your left thumb:
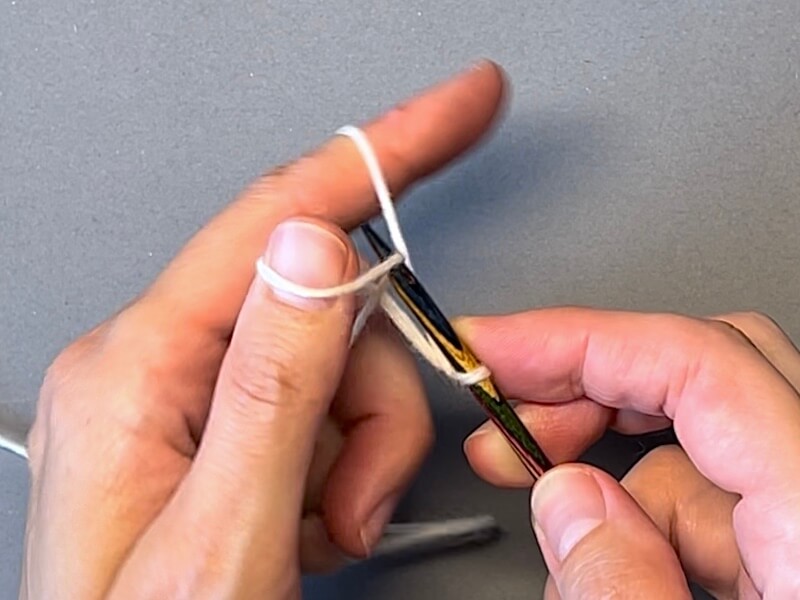
Grab the yarn lying on your index finger, and pull it towards you between the yarns wrapping around your thumb:
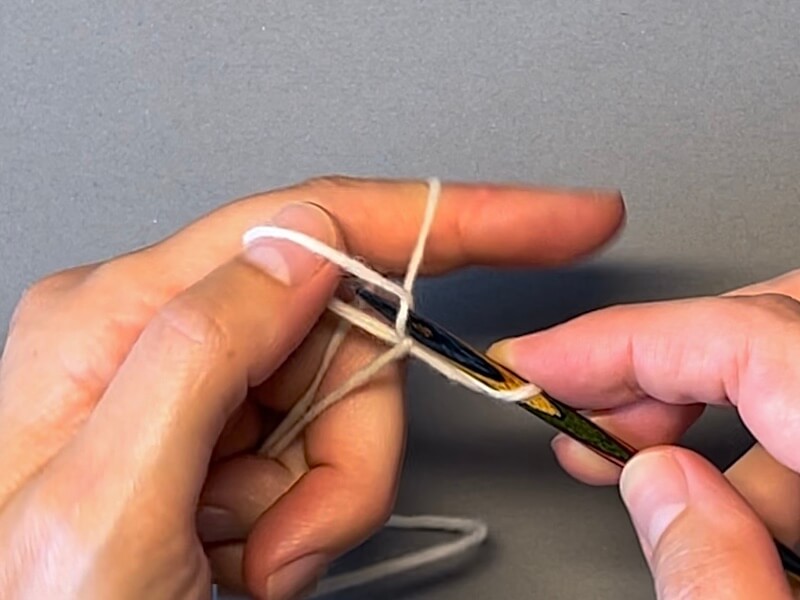
Pull tight, stretching the yarn with the thumb and index finger of your left hand:
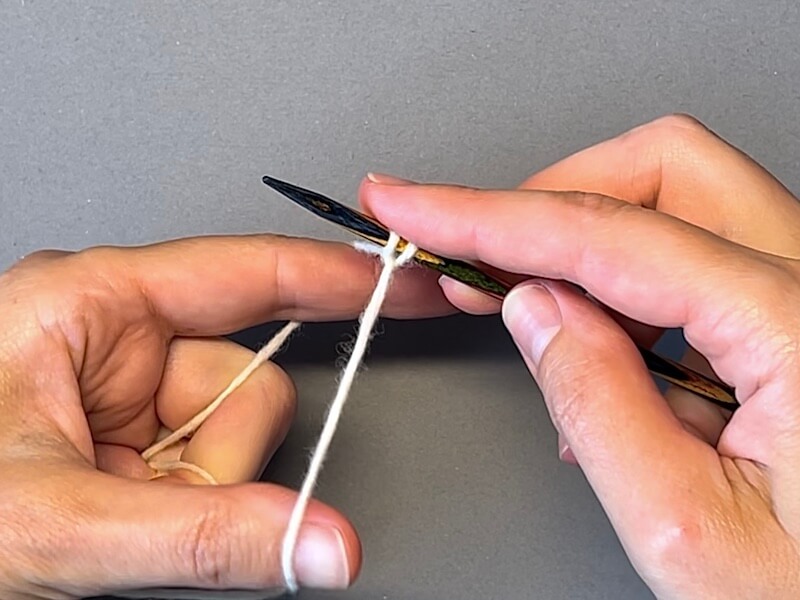
Repeat this motion the required number of times to form the desired number of stitches on the needle.
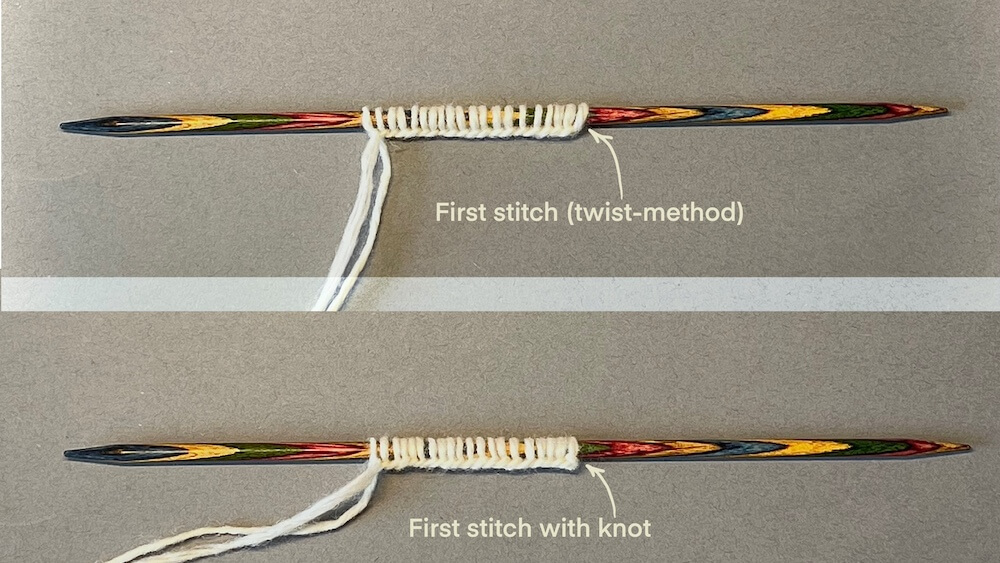
It’s time to compare how the first stitch looks with different methods of forming it:
II. Cast-on method using waste yarn (provisional cast-on)
This method is useful if you need to “open” and use the stitches of the first row later on. This technique is very similar to the classic method, with the only difference being that instead of a yarn “tail,” you use a waste yarn. Waste yarn is a yarn that contrasts in color with the main yarn and is similar in thickness. Based on these statements, it may seem that a “tail” is not needed, but we often leave a length of the main yarn to use it for knitting in the opposite direction from the first row. Usually, instructions will indicate this. The first stitch with this method is not created separately; it is part of the cast-on.
Place the main yarn on the index finger of your left hand and the waste yarn on the thumb of your left hand. Hold the “tails” between the free fingers and the palm of your right hand, and hold the working part of the main and waste yarns between the free fingers and the palm of your left hand. Lift the thumb of your left hand up:
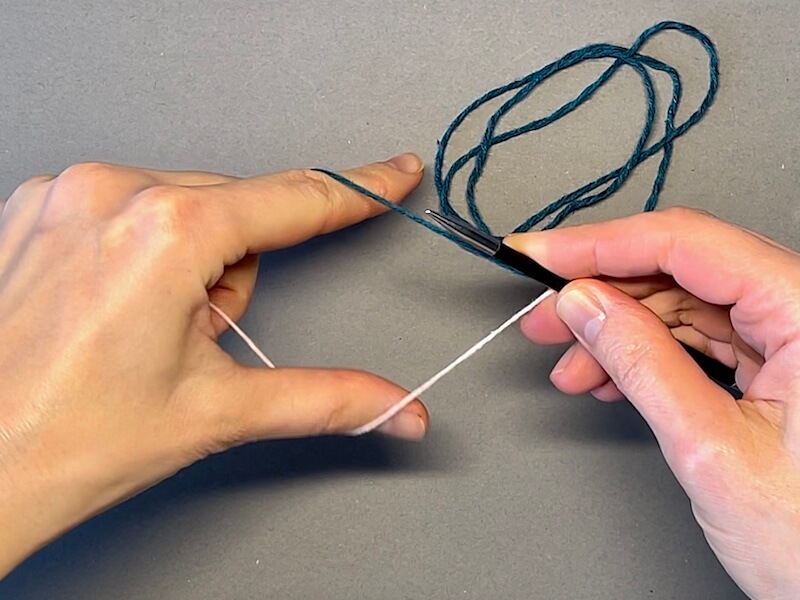
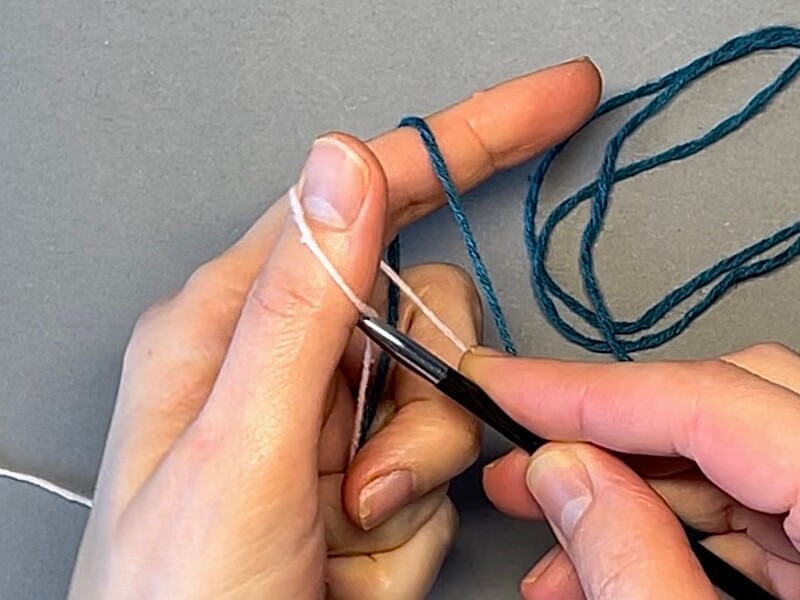
And insert the needle under the waste yarn in front of your thumb:
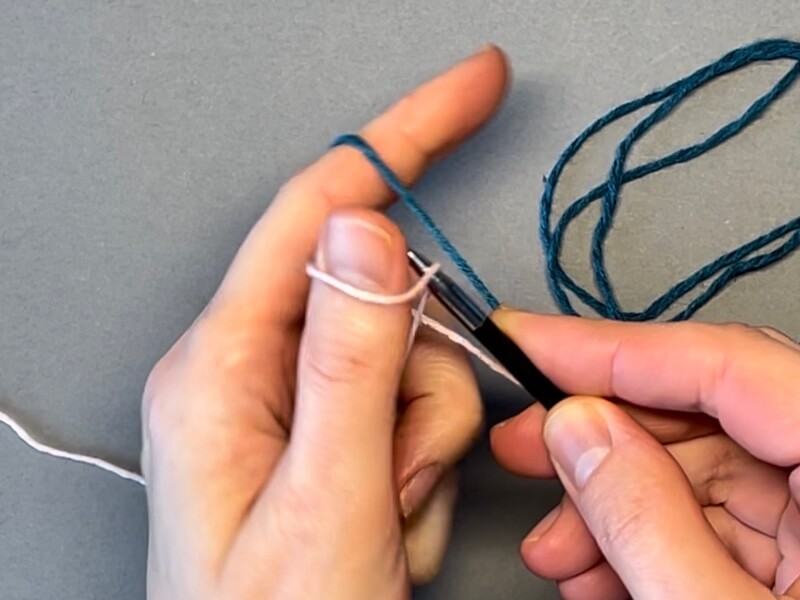
Continue the needle movement over the yarn behind your left thumb:
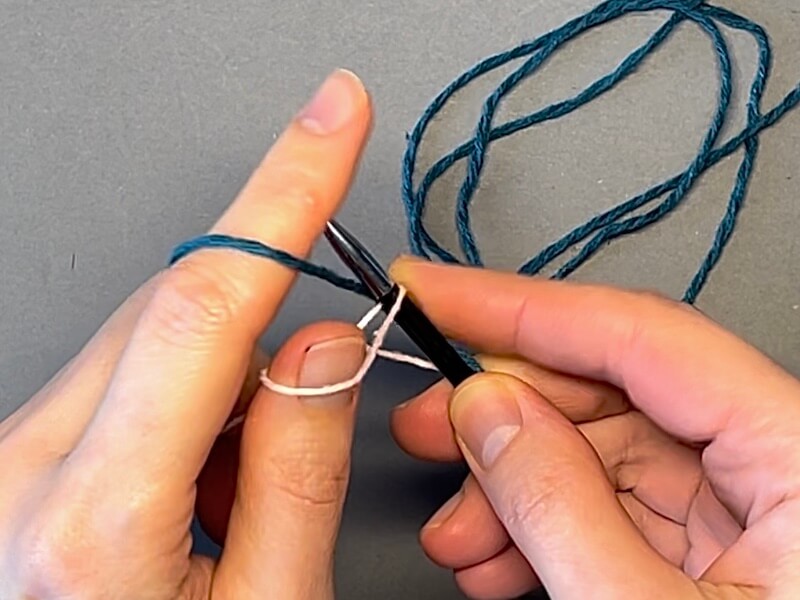
Grab the yarn lying on your index finger, and pull it towards you between the yarns wrapping around your thumb:
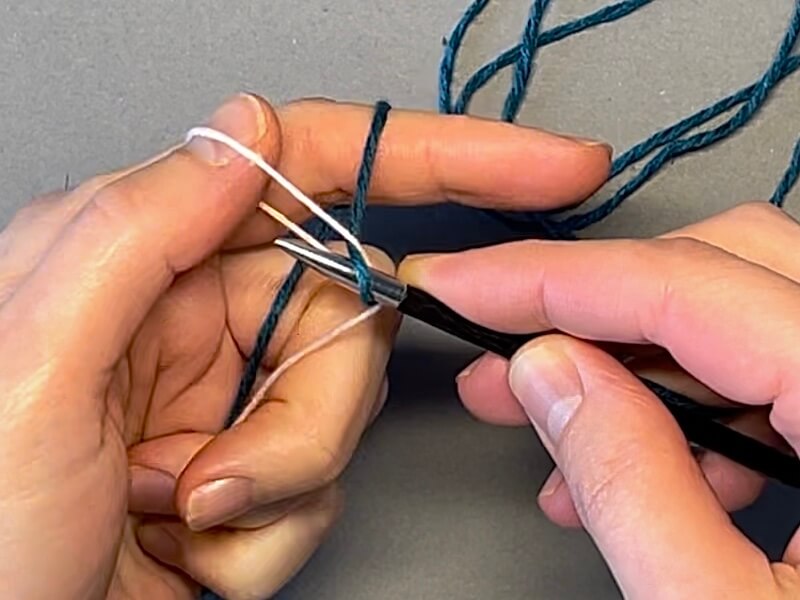
Pull tight, stretching the yarn with the thumb and index finger of your left hand:
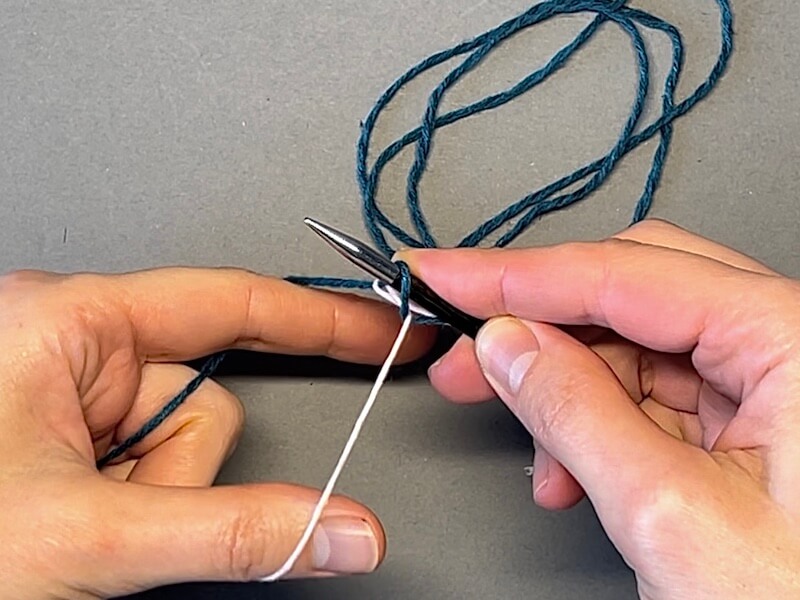
Repeat this motion the required number of times to form the desired number of stitches on the needle.
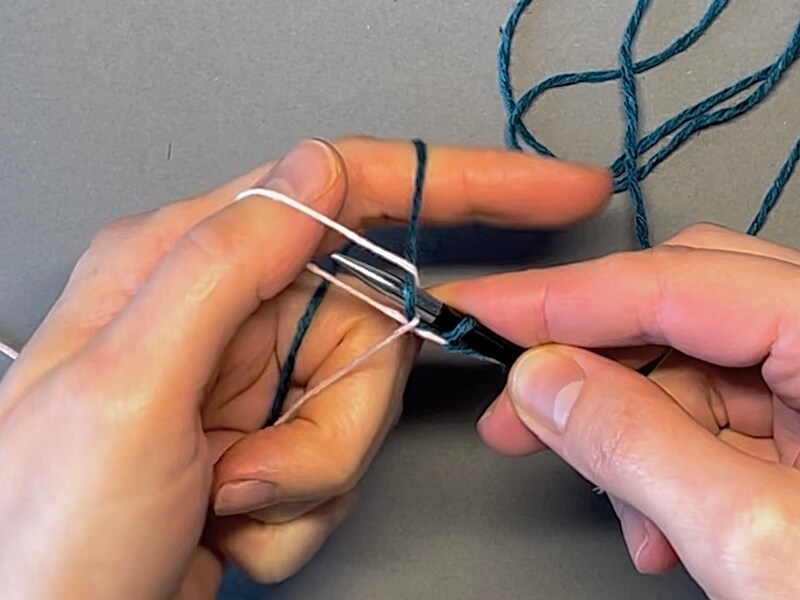
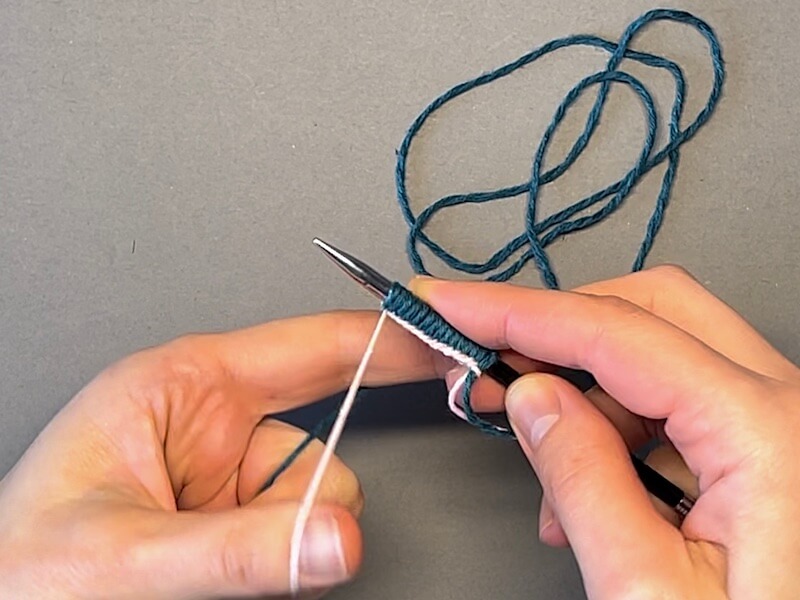
And finally, the reason behind all this work with the waste yarn: this method allows you to easily pick up the stitches of the first row onto your needles (the waste yarn is contrasting, making it easy to distinguish from the main yarn). The stitches can be released gradually, as needed.
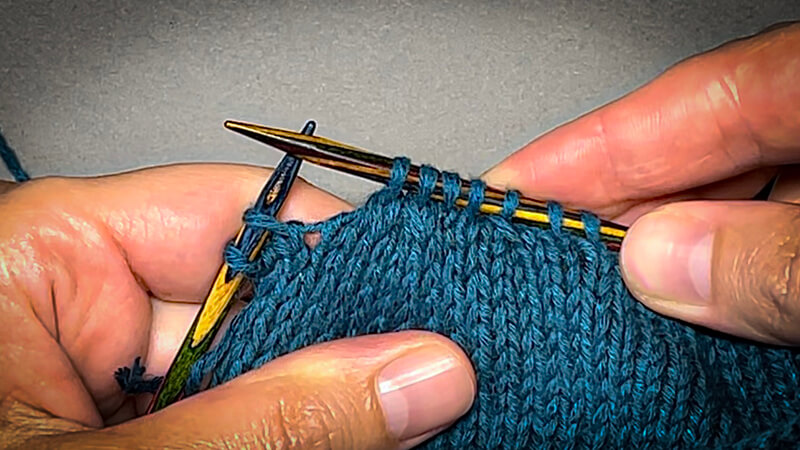
Find the beginning of the first row and insert the needle into the first stitch of the first row through which the waste yarn passes:
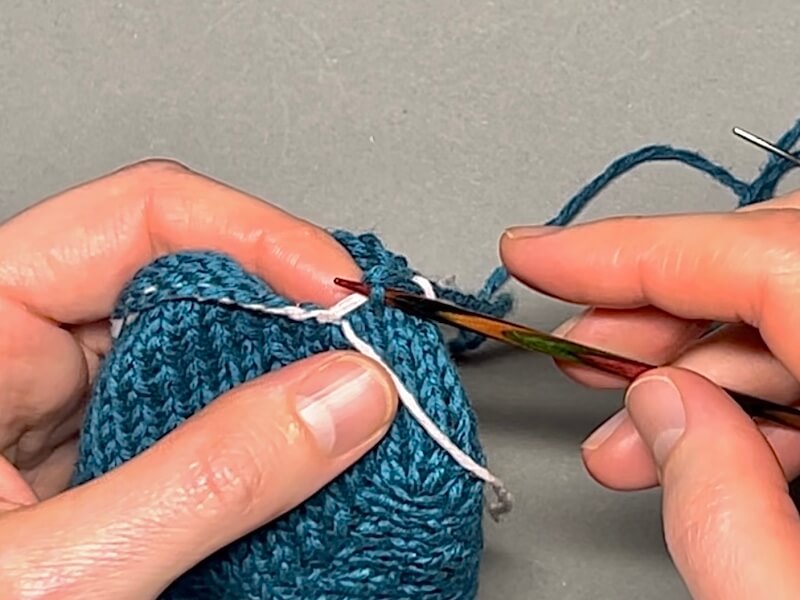
Release this stitch from the waste yarn by pulling it out with an additional needle or a tapestry needle:
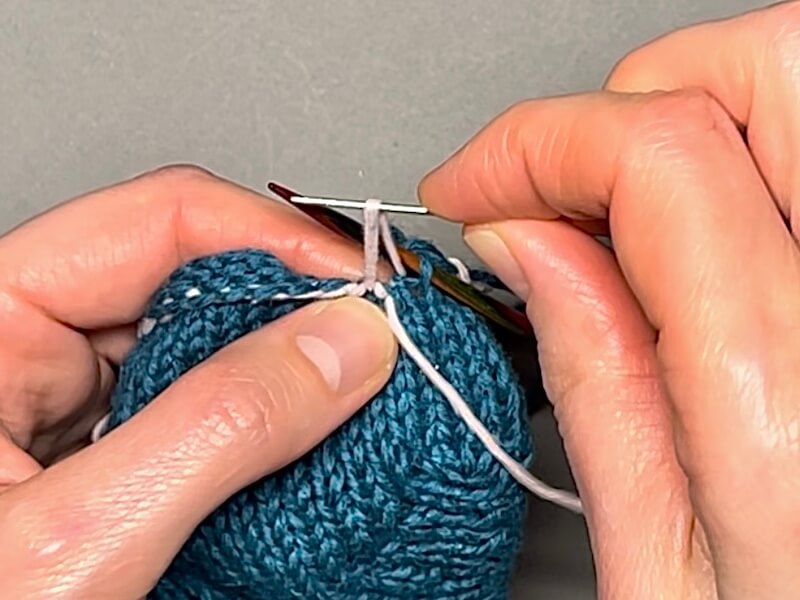
Repeat these movements until the waste yarn is completely removed: insert the needle into the next stitch of the first row, release it from the waste yarn, and so on.
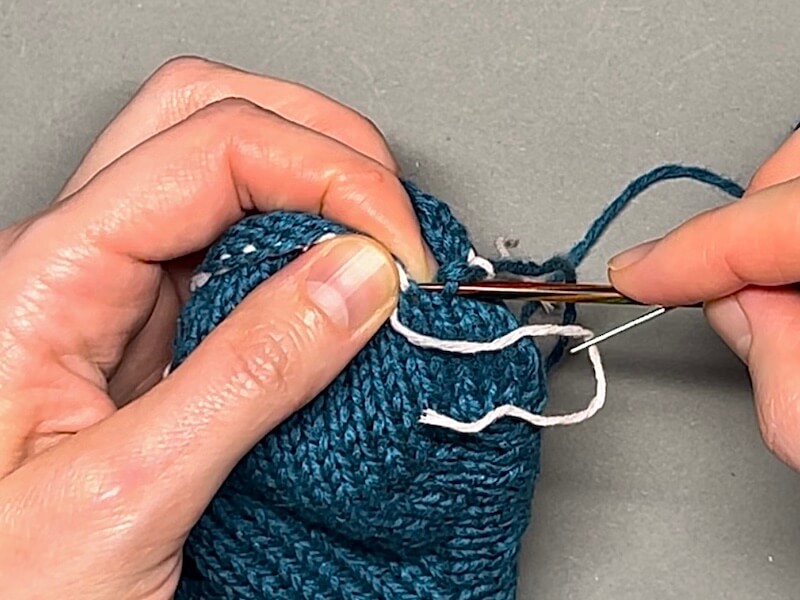
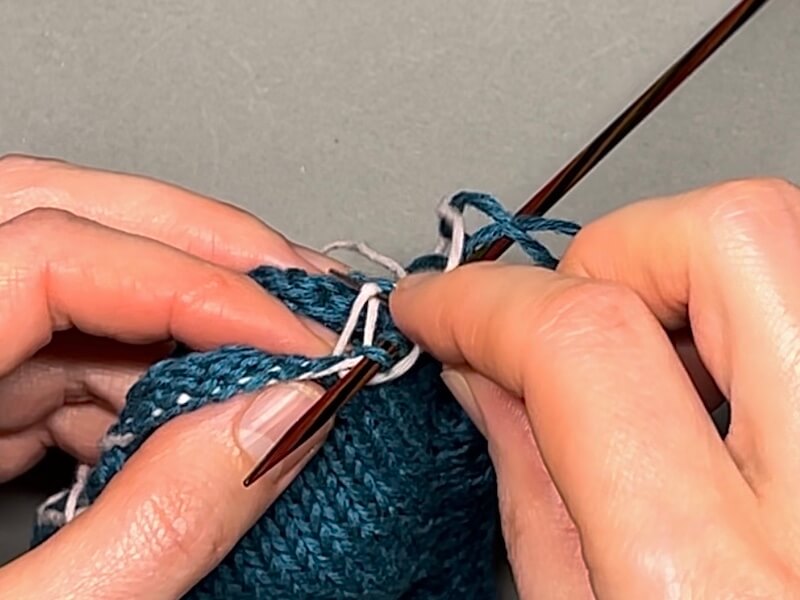
Now, you can use this edge with live stitches for creating knitted seams, ribbing, lengthening the piece, and other purposes.
Of course, there are a multitude of methods for casting on stitches, and it’s impossible to cover all of them. Each project uses the most suitable method. This article covers the methods commonly found in TARITOYS patterns.
I hope this article has been helpful and has detailed the methods described.
Enjoy your knitting! 🧶
Best regards,
Tatyana .
SHARE


