Kitchener stitch or grafting
In this article we will talk about a type of knitting seam called the Kitchener stitch or grafting.
Table of contents
1. Introduction
5. Conclusion
Introduction
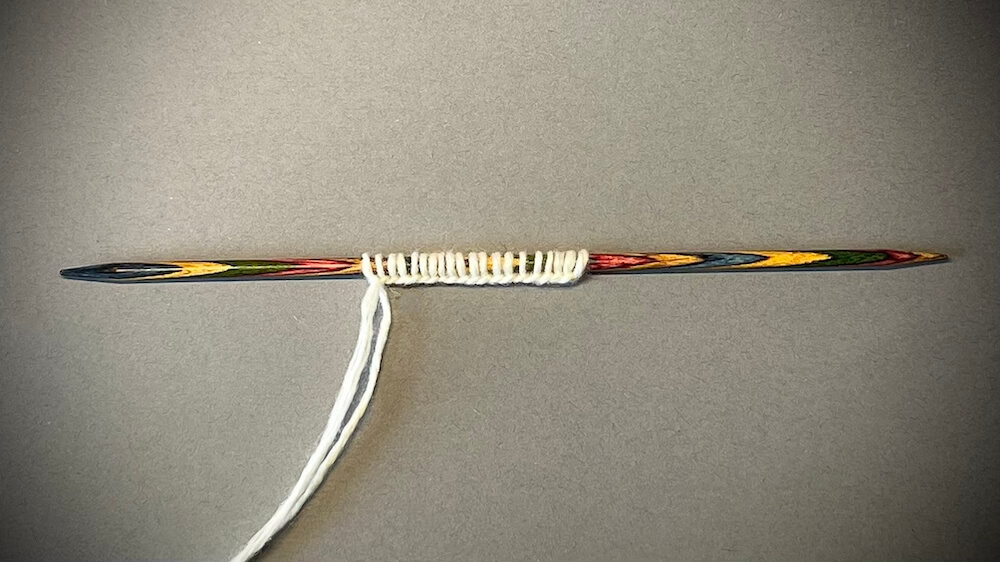
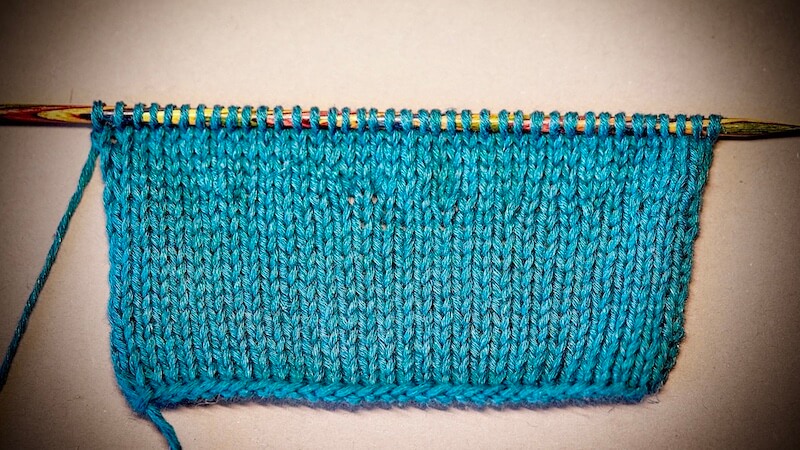
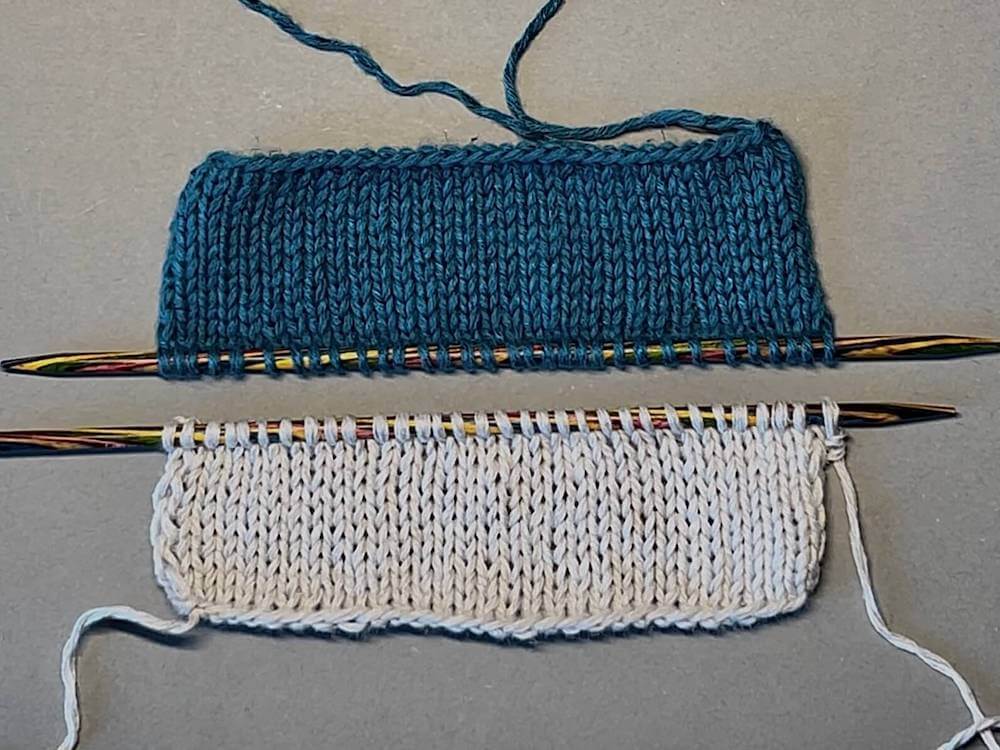
The Kitchener stitch is used to create an invisible horizontal seam, it joins two rows of live stitches together. Basically, we are creating an additional row between two pieces with live stitches:
To perform the Kitchener stitch, you will need:
1) Two pieces with stitches on needles on at least one side;
2) A yarn that is at least 4 times the length of the future seam (better – 5). This can be the yarn left over from knitting one of the pieces or a separate yarn (depending on the project);
3) A needle with a blunt tip and a large eye (a tapestry needle).
So, let’s begin with the technique for performing the Kitchener stitch.
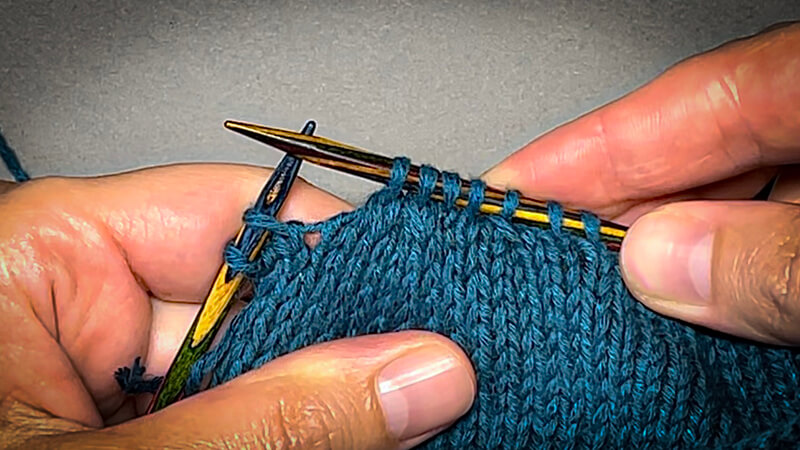
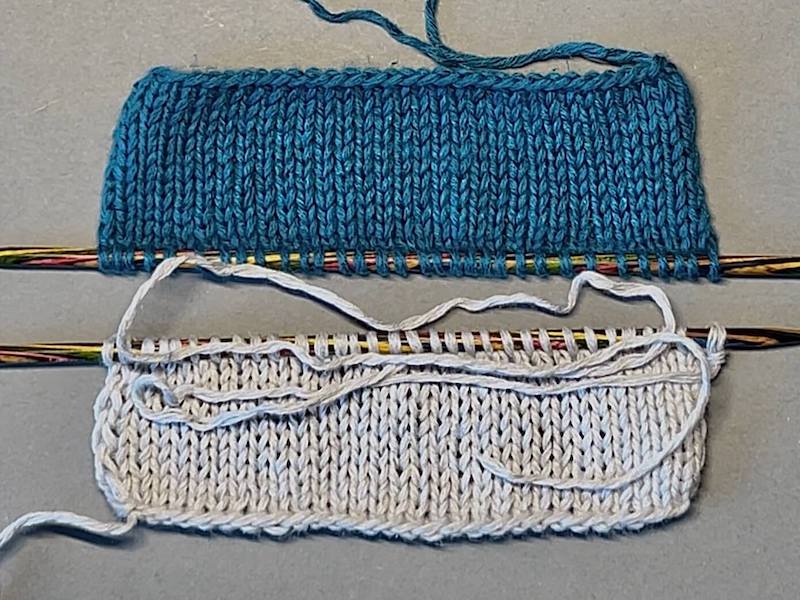
Cut a yarn tail approximately 4-5 times the length of the future seam. Thread this yarn through a needle with a tapestry needle. Place the two pieces wrong sides together.
The piece with the yarn you will use for the seam should be closer to you, and the other piece behind it:
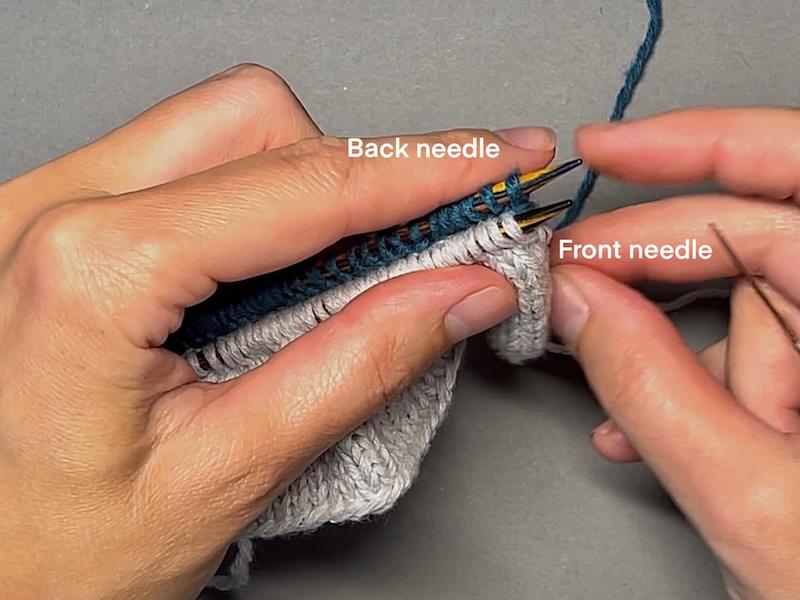
Algorithm and methods
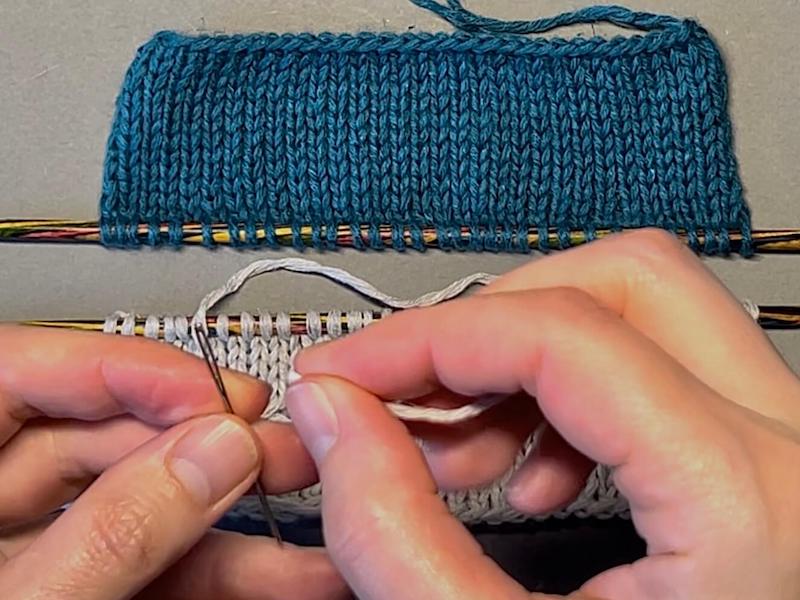
Now our task is to create another row of stitches between the rows of the two pieces. To do this, alternate stitches by inserting the needle into 2 stitches on one piece, then into 2 stitches on the other piece.
The algorithm is easy to remember if you imagine that there is a sea between the two pieces. Each time, we first dive into the sea and then resurface: first in, then out.
Insert the needle into the first stitch on the back needle as if to purl (dive into this sea):
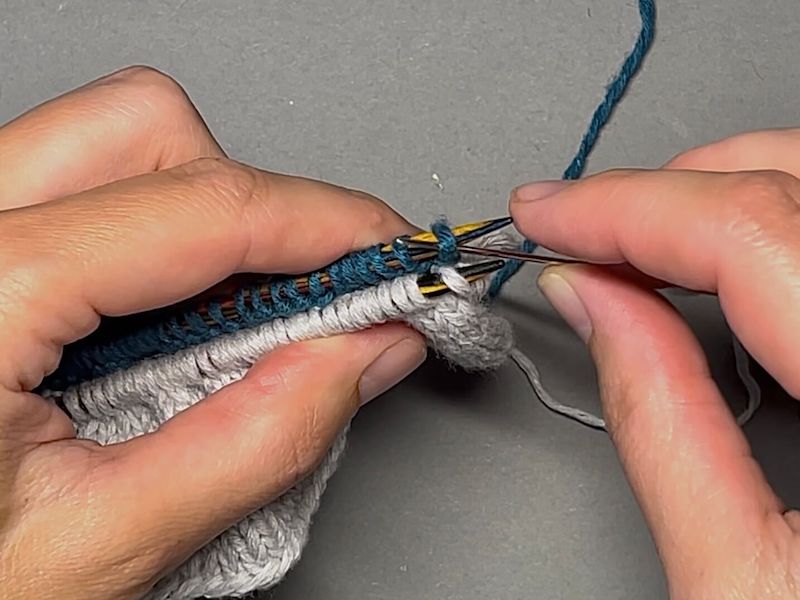
And slip the stitch off the needle:
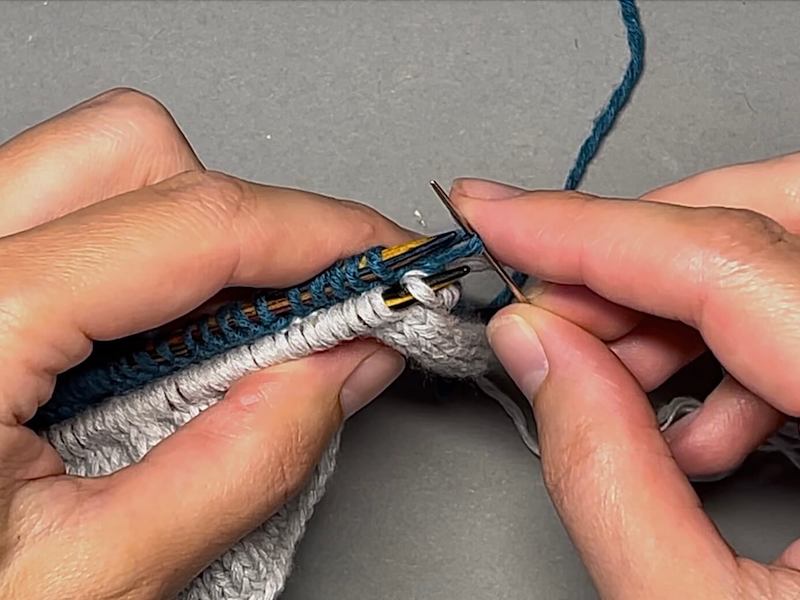
Insert the needle into the first stitch on the back needle as if to knit (resurface):
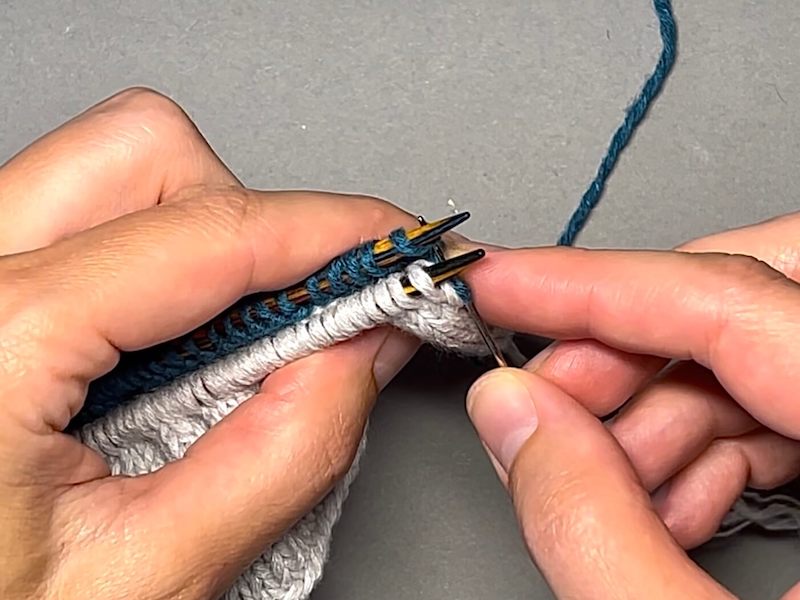
Leave the stitch on the needle, pull the thread out:
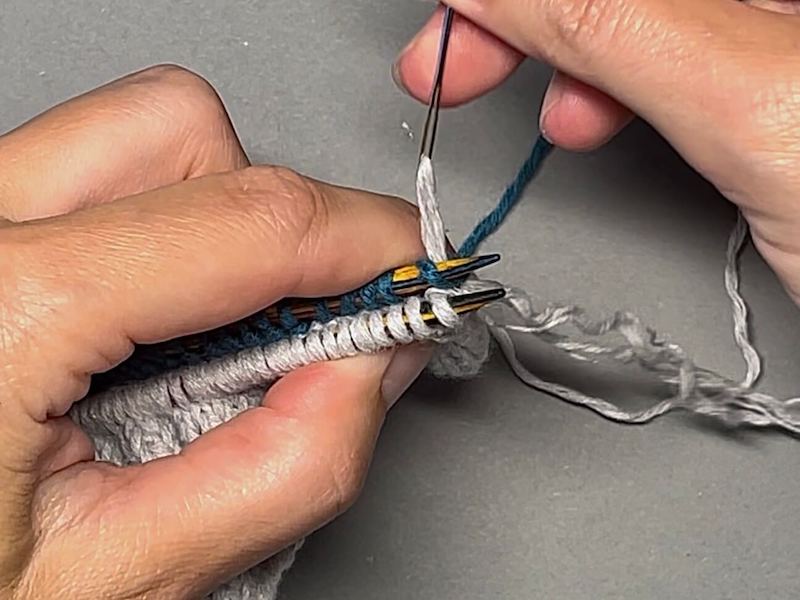
Insert the needle into the first stitch on the front needle as if to knit (dive into this sea):
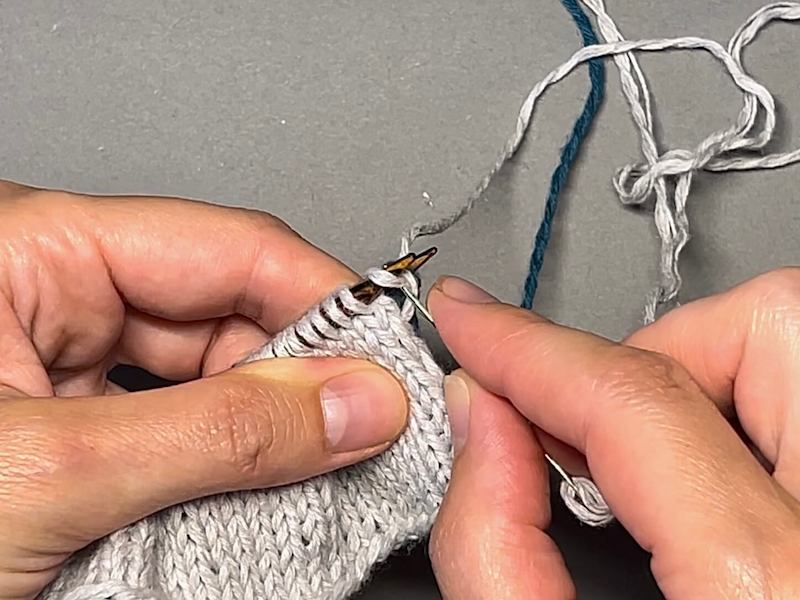
And slip it off the needle:
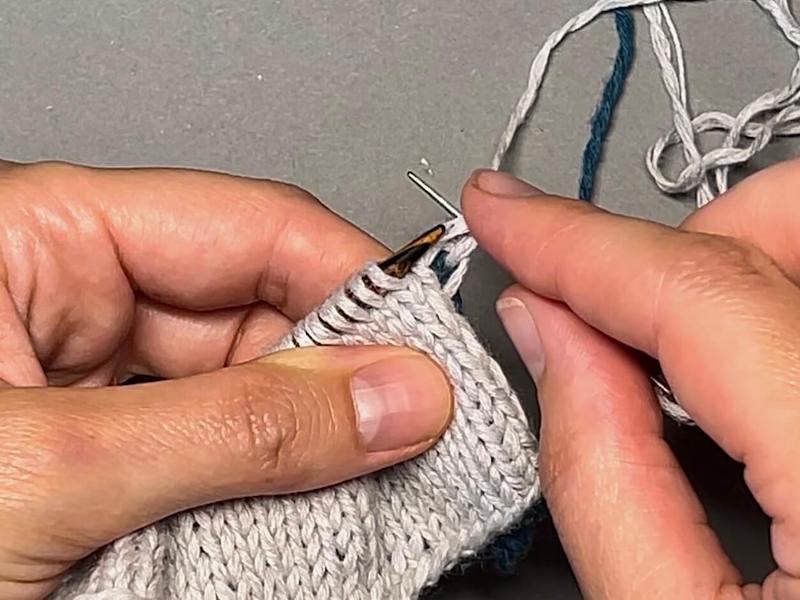
Insert the needle into the first stitch on the front needle as if to purl (resurface):
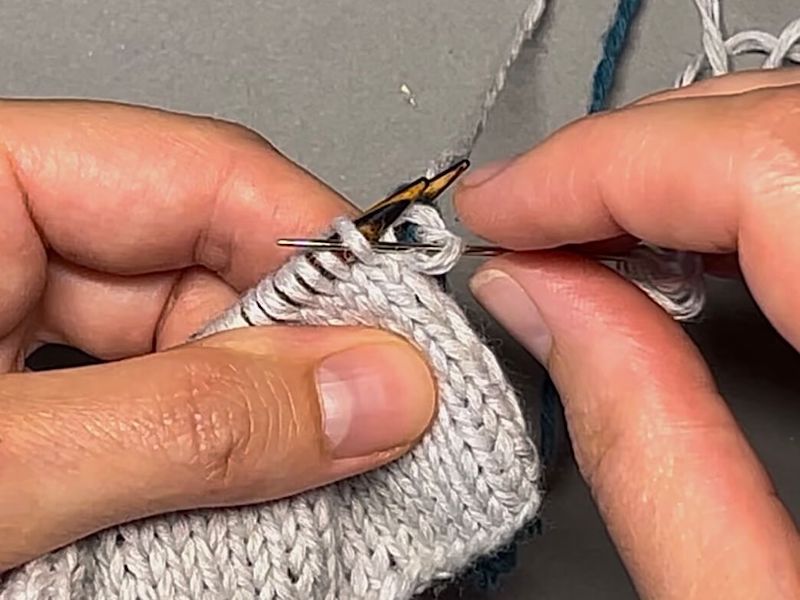
Leave the stitch on the needle, pull the thread out:
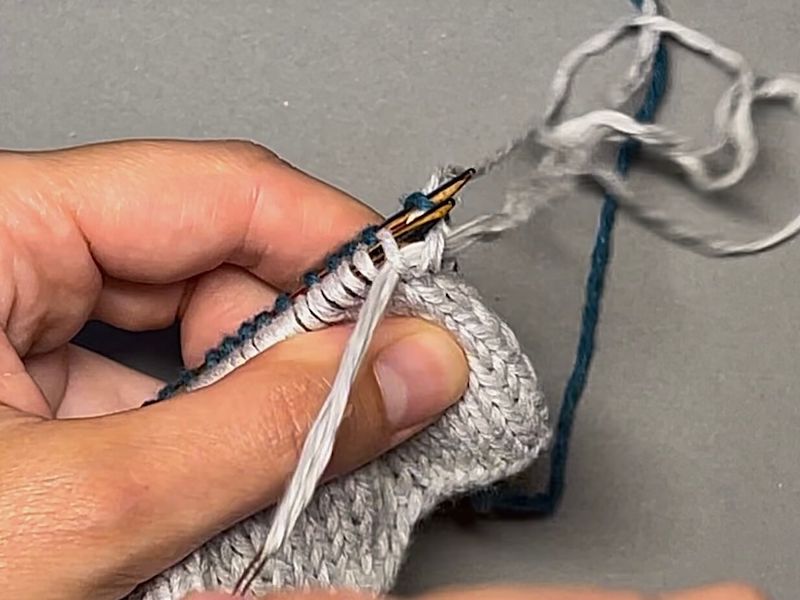
Repeat these steps until there is one stitch left on each needle.
Based on experience, I recommend not tightening the yarn in the newly created stitches immediately. It’s better to do this in steps. Create 6-8 stitches, then distribute the seam yarn evenly according to your knitting tension. Then do the same with the next group of stitches.
Make sure the tension of the seam stitches matches your knitting tension. It is important for the stitches to be identical throughout the entire piece.
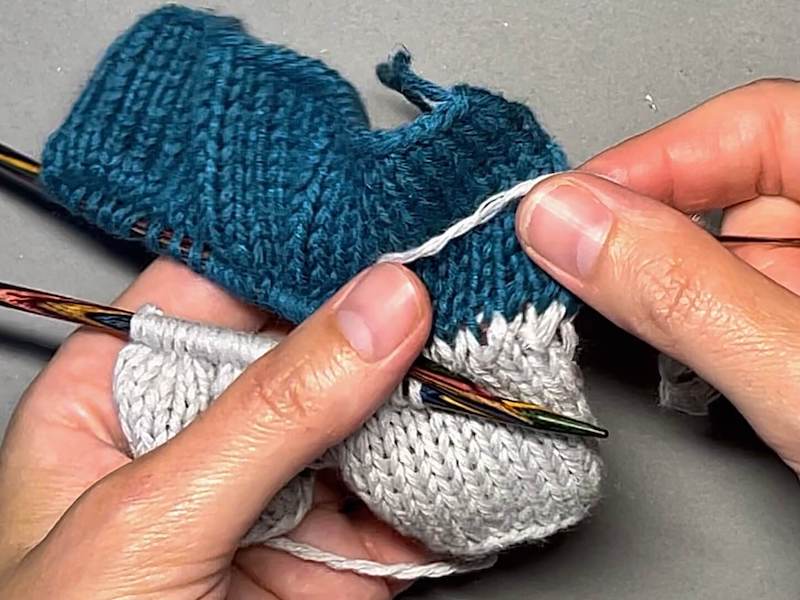
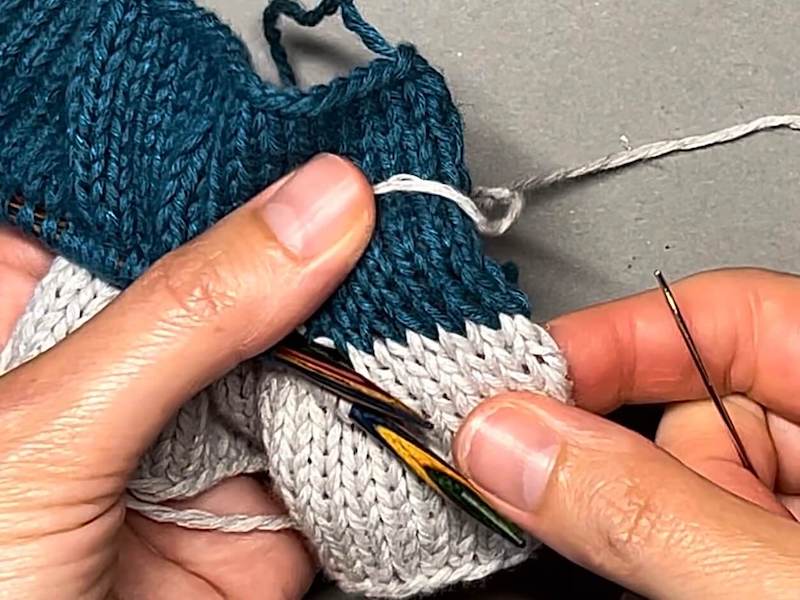
When the stitches in this section are evened out, you can move on to the next section.
The pieces can also be placed on a horizontal surface if it’s more convenient ⏰ 03:22 – in video:
Insert the needle into the first stitch on the back needle as if to purl (dive into the sea), slip the stitch off the needle:
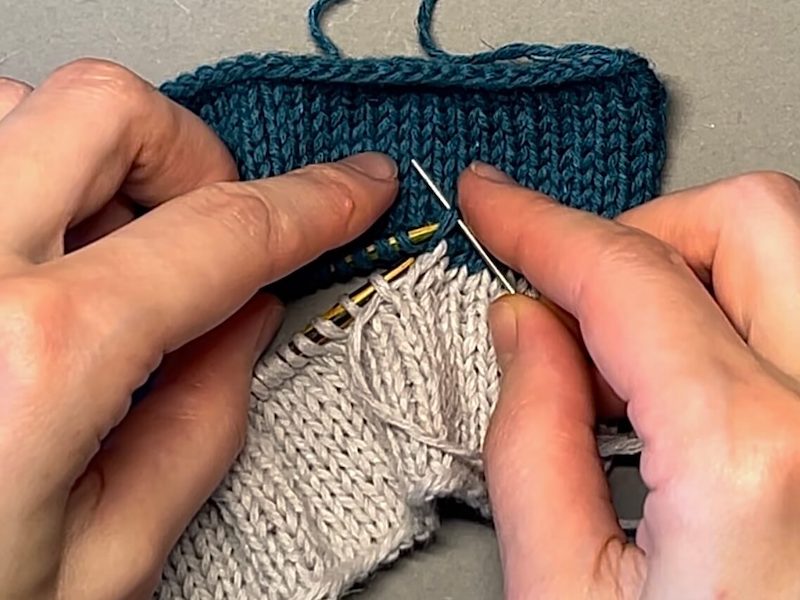
Insert the needle into the first stitch on the back needle as if to knit (resurface), leave the stitch on the needle, pull the thread out:

In and out on the front needle:
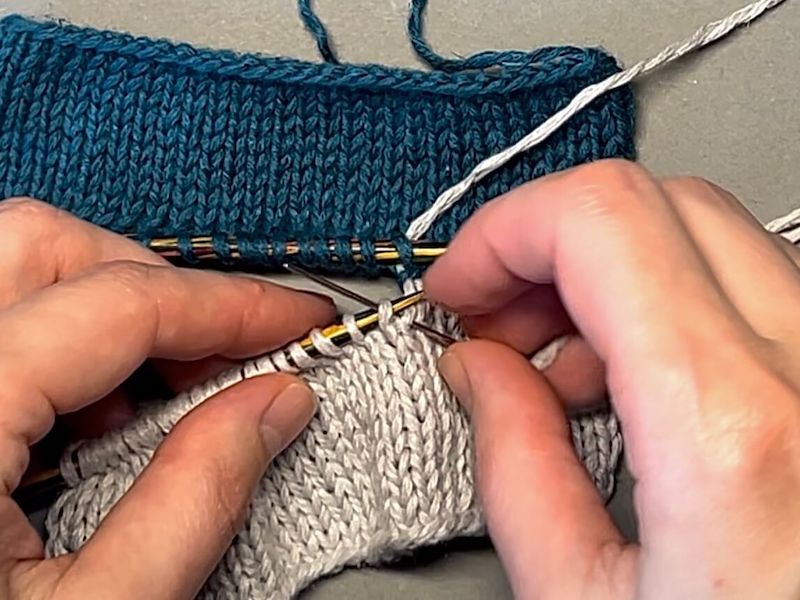
Additionally, the stitches can be literally live and not on needles. This makes it harder to control the direction of the stitches and their presence in the row, but with sufficient experience, this method can sometimes be used ⏰ 03:40 – in video:
Insert the needle into the stitch on the back needle from which the last stitch of knitted seam emerged as if to purl (dive in) and insert the needle into the next stitch on the back needle as if to knit (resurface):

Pull the thread out:

Insert the needle into the stitch on the front needle from which the last stitch of knitted seam emerged as if to knit (dive in) and insert the needle into the next stitch on the front needle as if to purl (resurface), pull the thread out:
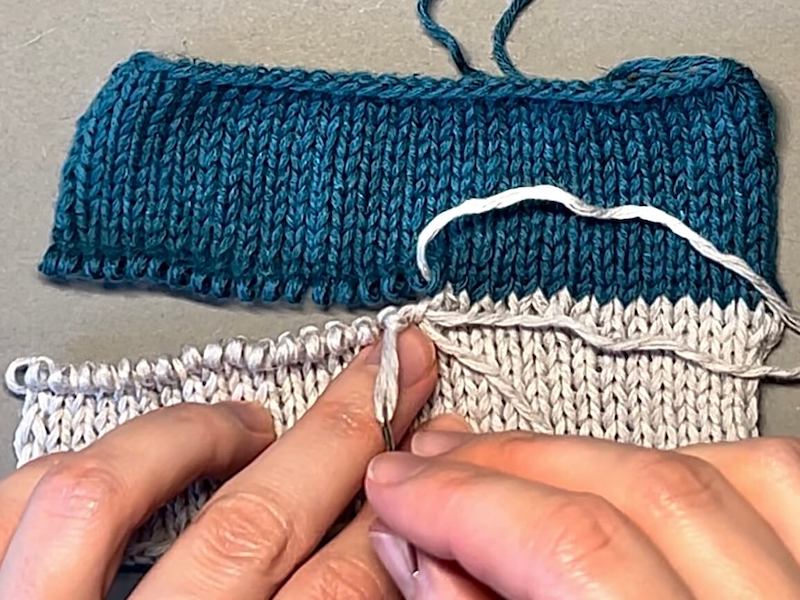
Completion of the seam
And now, having completed all the Kitchener stitches, let’s finish it off .
When there is 1 stitch left on each needle:

Insert the needle into the stitch on the back needle as if to purl, slip it off the needle, pull the thread out:
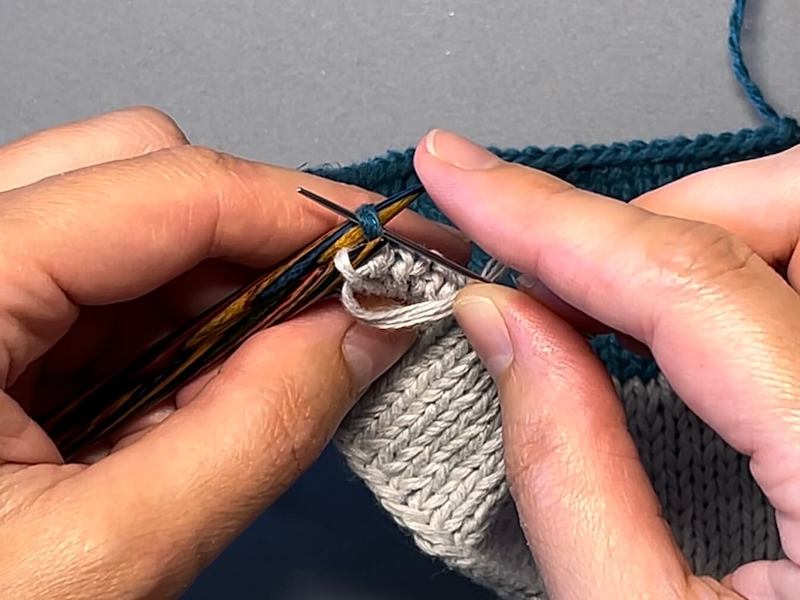
Then into the stitch on the front needle as if to knit:

Slip it off the needle and pull the thread out:

And distribute the remaining stitches evenly:


Conclusion
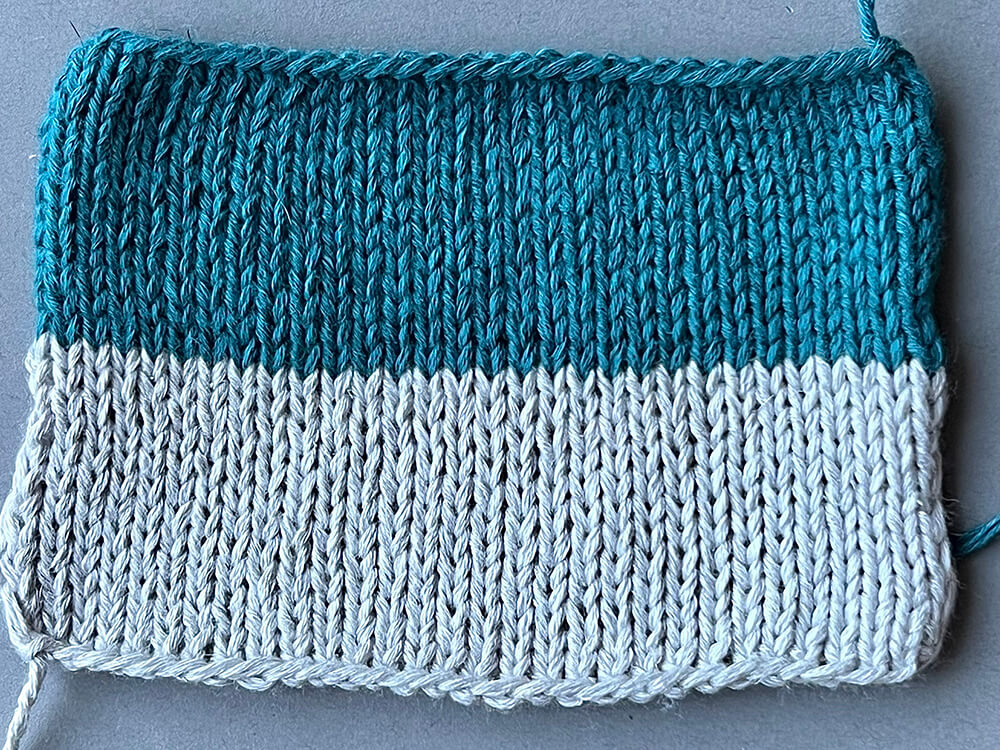
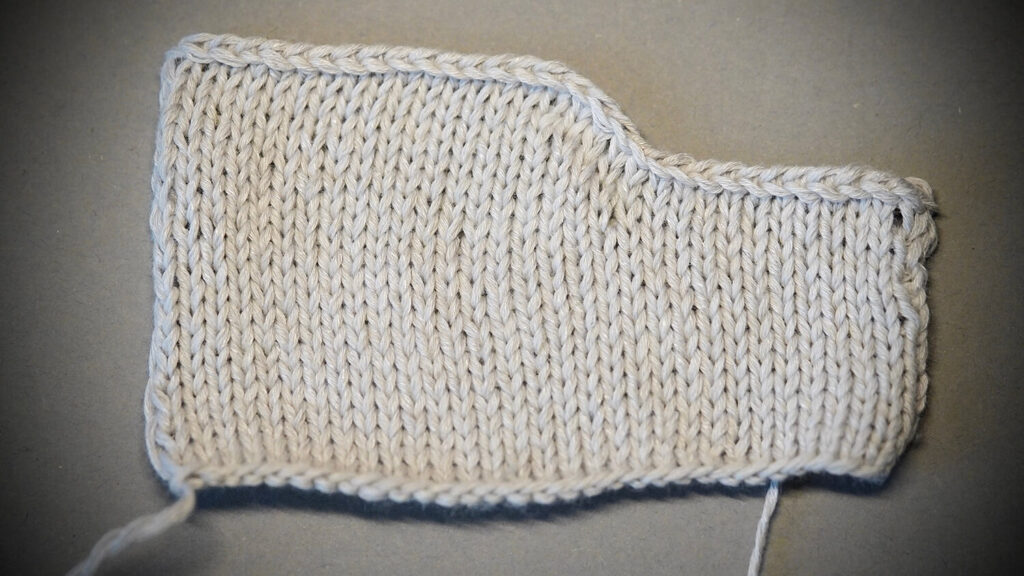
That’s it! This was the Kitchener stitch, which joins two pieces with live stitches. There are many modifications of the Kitchener stitchh for different situations, such as joining two parts of the same piece in circular knitting (for example, closing the toe of a sock), or when you need the edge of the item to round off smoothly in the seam area. All these modifications are usually described in detail in the patterns.
The main goal of this article was to thoroughly explain the algorithm for working with the Kitchener stitch.
I sincerely hope this article has been helpful and has added another knitting technique to your repertoire.
Enjoy your knitting! 🧶
Best regards,
Tatyana .
SHARE


