
Increases in knitting
Increases are one way to expand knitted fabric. This article will cover all types of increases used in TARITOYS patterns.
Table of contents
🧶 Increases from a stitch of the previous row (Lefted Increases & Knit 1 Below Increases),
🧶 Modern new type of increase called “twincrease” by @assia.brill.
Of course, there are many more types, each suitable in its own case.
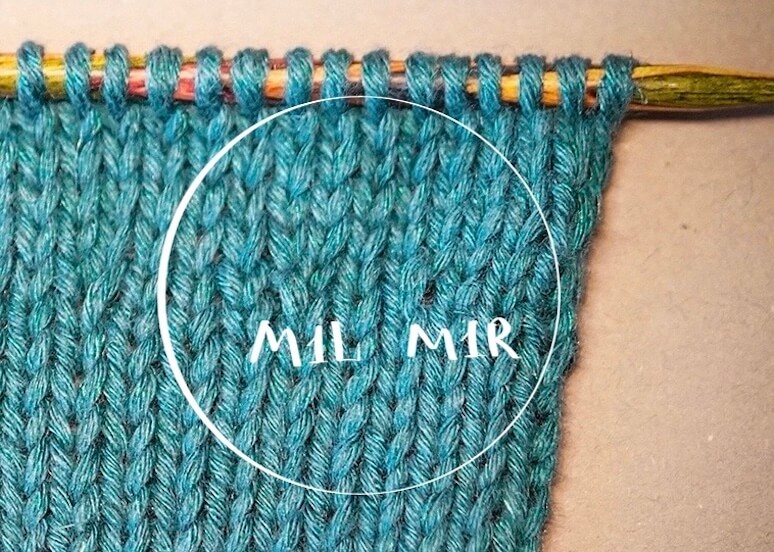
M1R & M1L
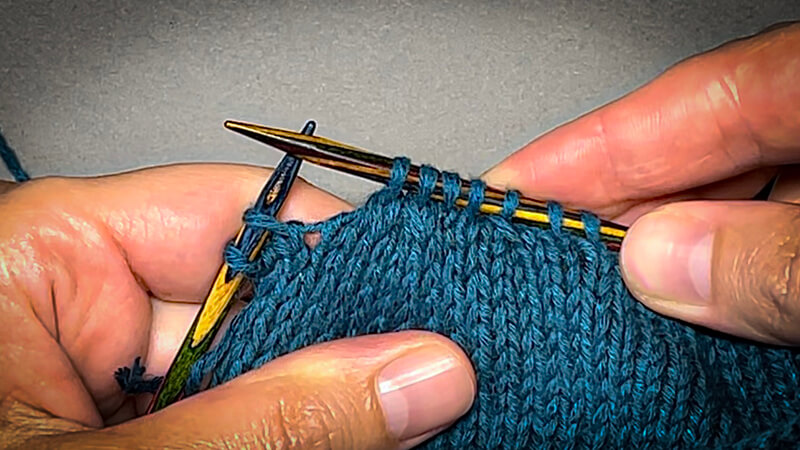
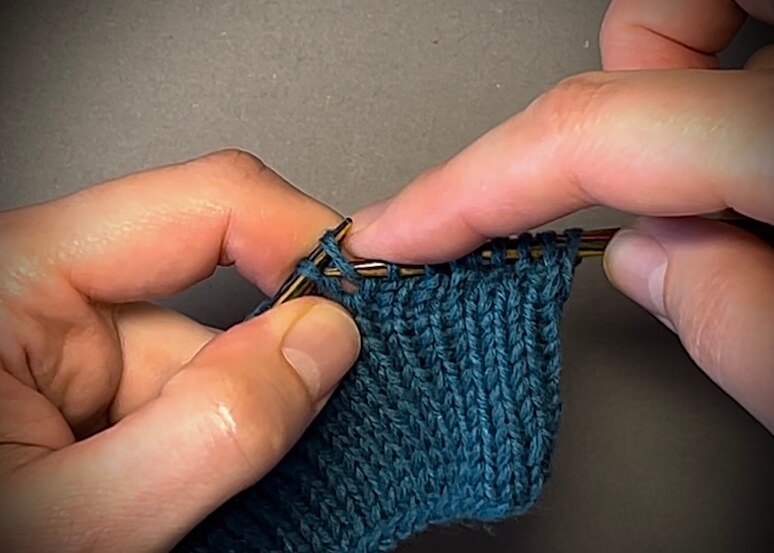
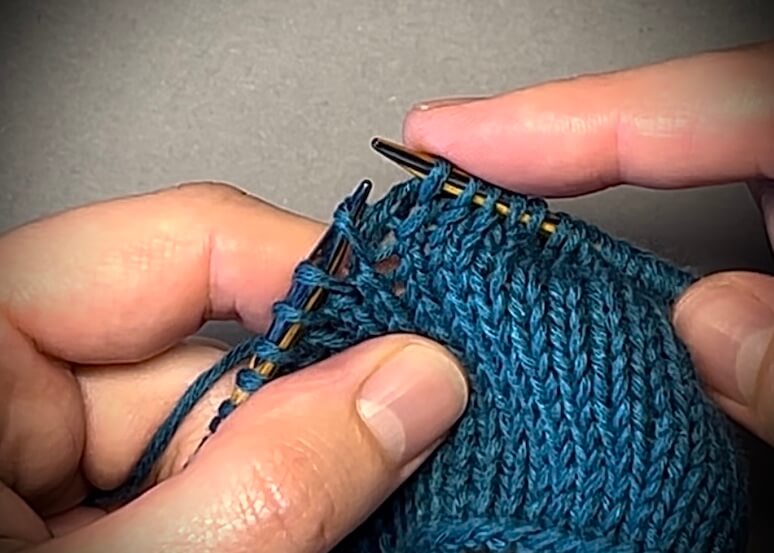
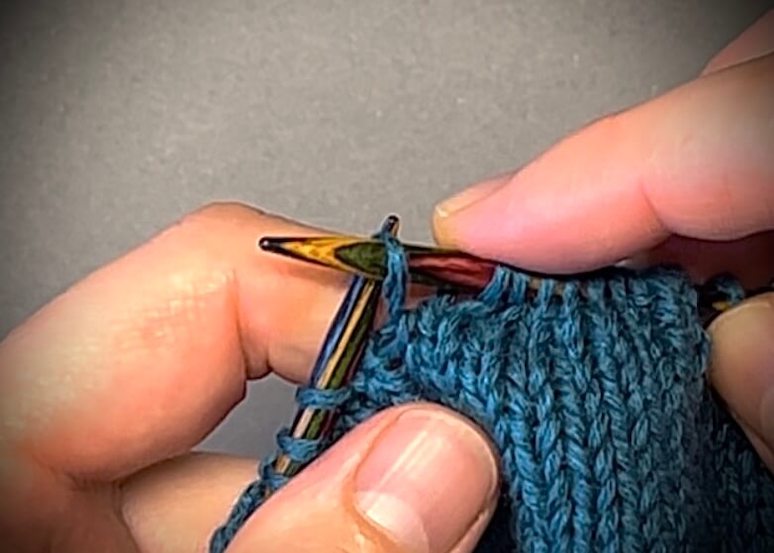
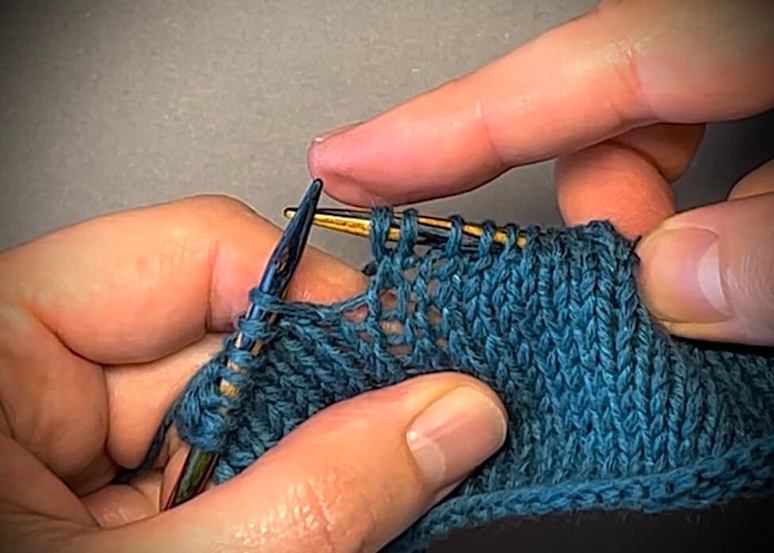
And let’s start with the most common increases: M1R and M1L – increases made by knitting into crossed horisontal strands between the stitches, which allows for perhaps the tightest form of increases. ⏰ 00:30 – in video
M1R
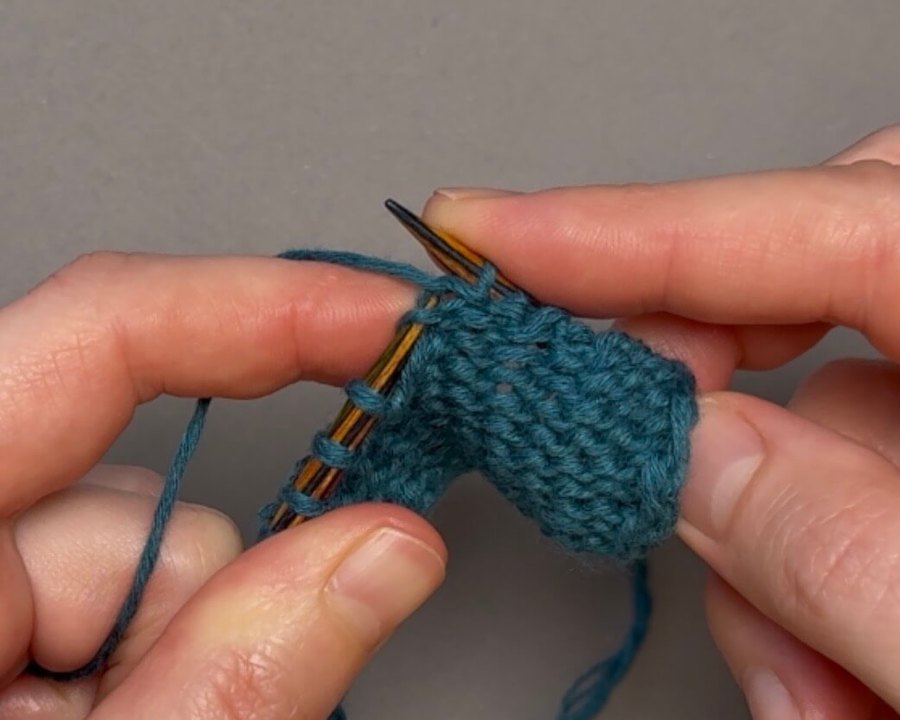
To make a right-leaning M1 increase (M1R), pick up the horizontal strand between the just-knitted stitch and the next stitch on the left needle with the right needle and place it onto the left needle with the left loop forward.
Actually, it’s easy to remember how to position the strand on the needle because when knitting increases to the right, the stitch formed by the strand also “looks” to the right.
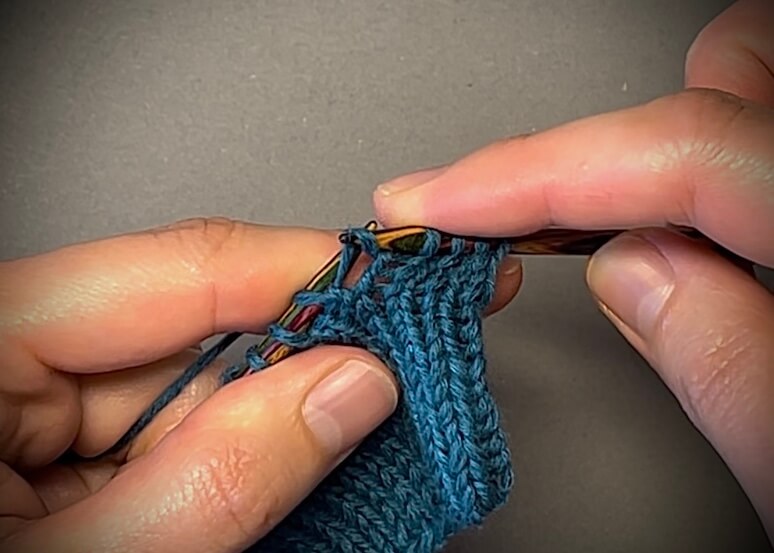
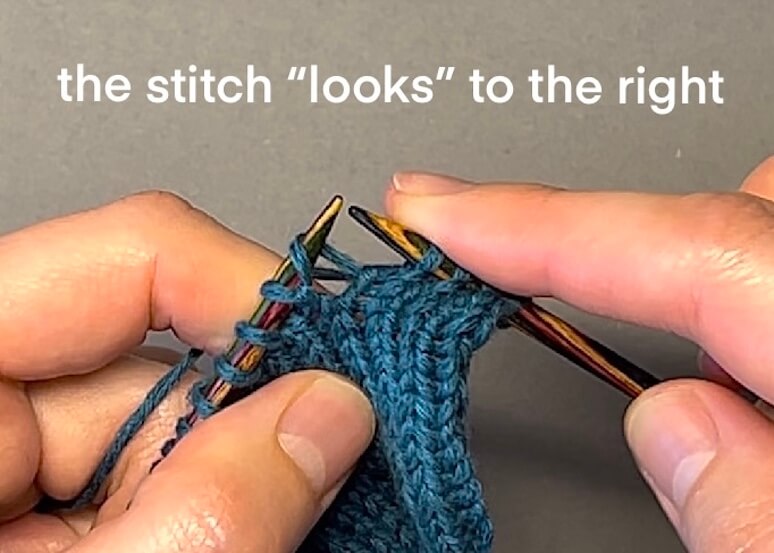
Insert the right needle under the left loop of the strand from left to right and knit it, twisting the strand to prevent a hole from forming where the new stitch is created.
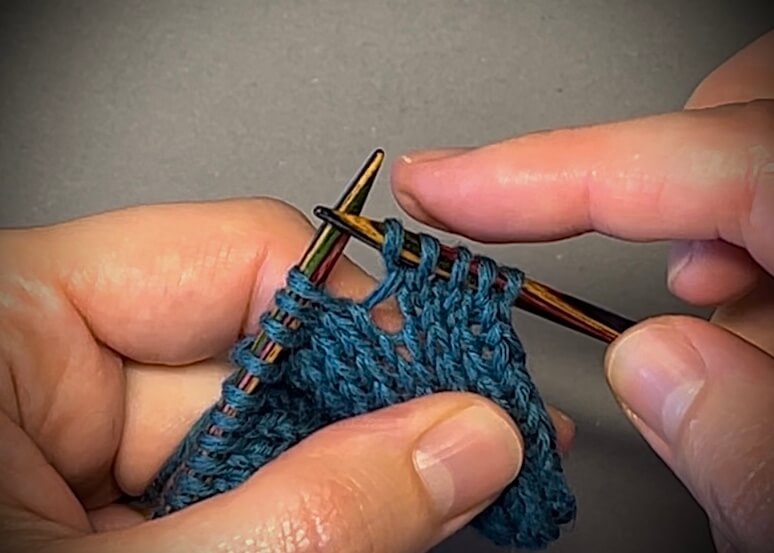
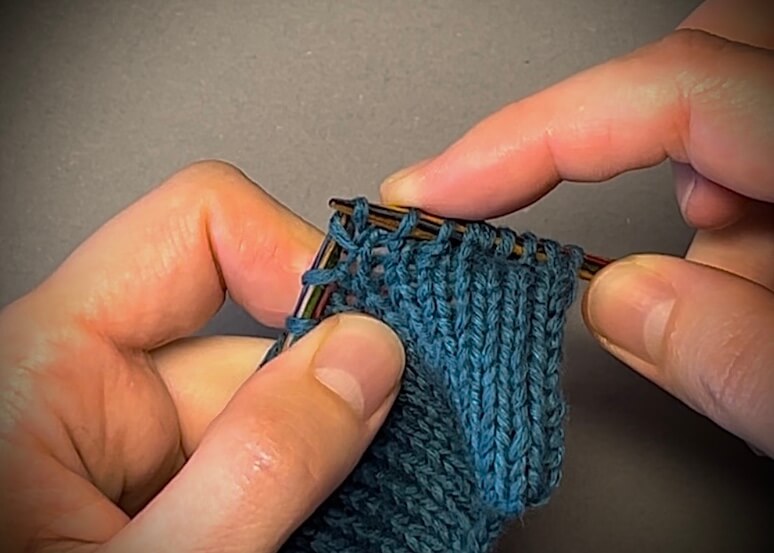
The newly formed stitch is slanted to the right:
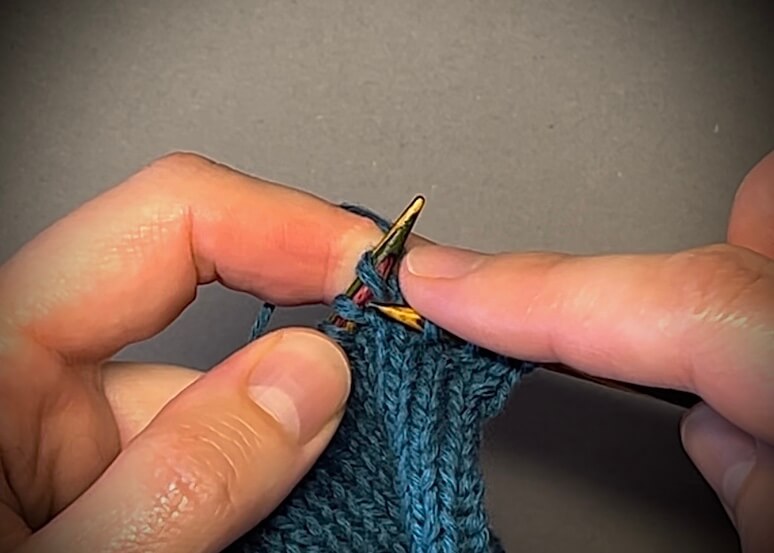
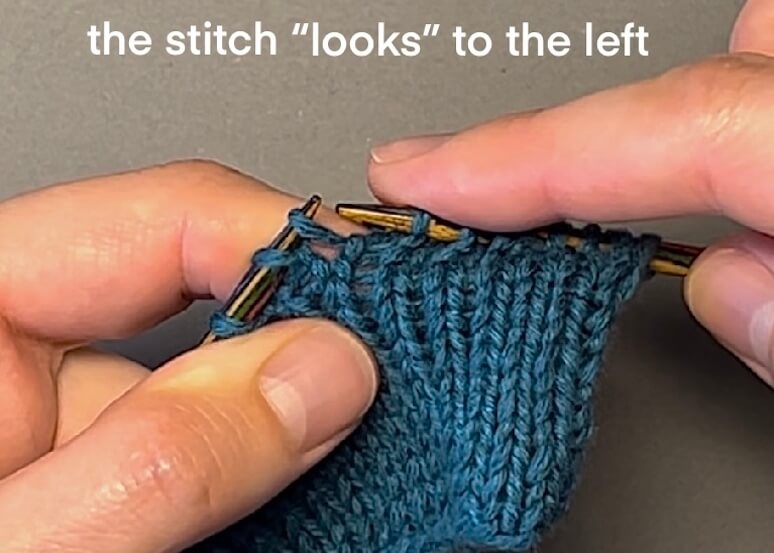
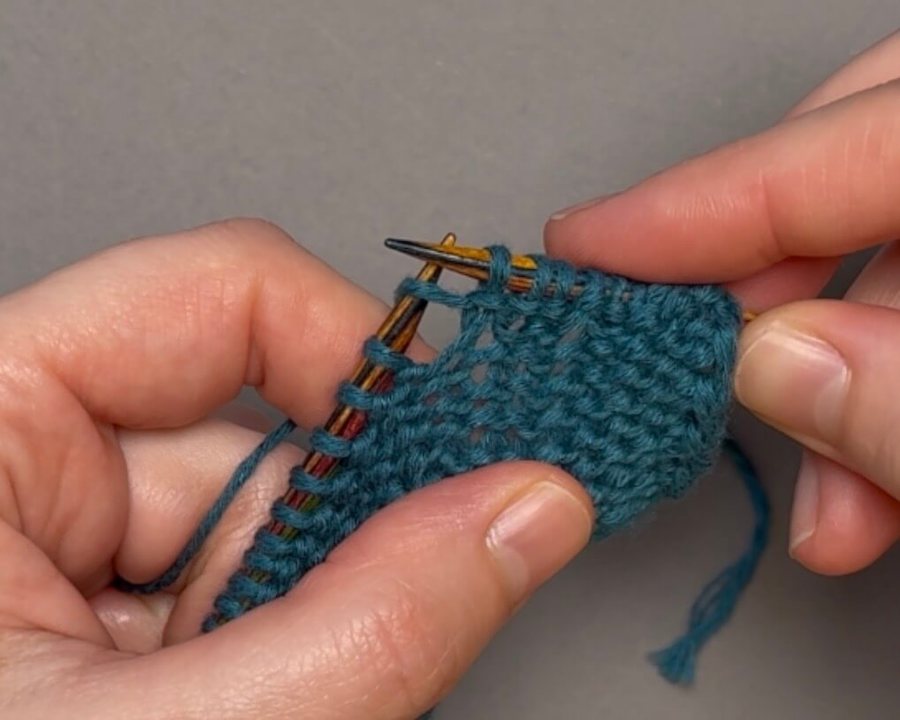
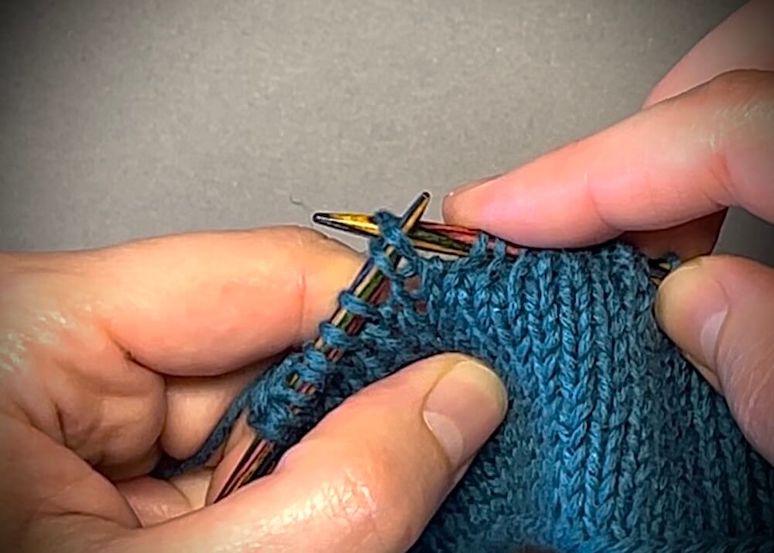
M1L
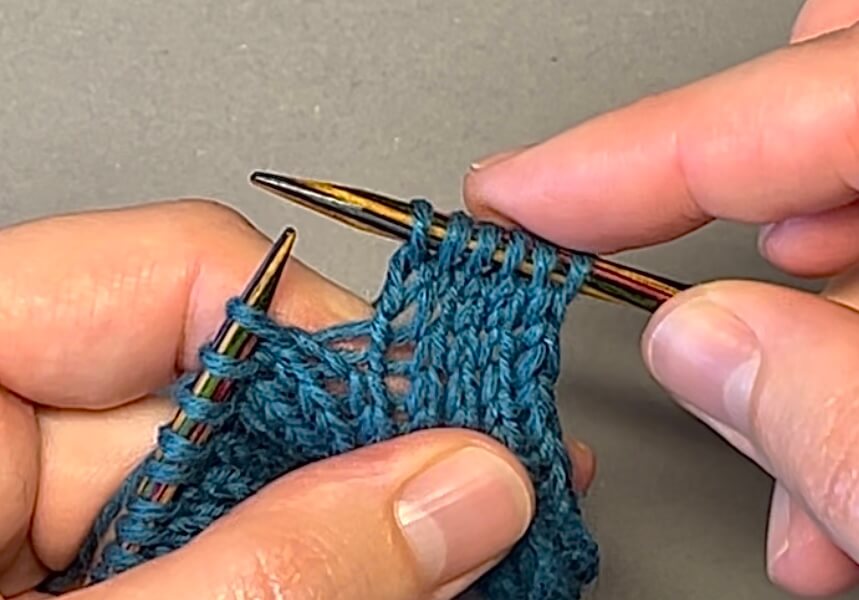
To create a left-leaning M1 increase (M1L), pick up the horizontal strand between the just-knitted stitch and the next stitch on the left needle with the right needle and place it onto the left needle with the right loop forward.
When knitting increases to the left, the stitch formed by the strand also “looks” to the left.
Insert the right needle under the right loop of the strand from right to left and knit it, twisting the strand to prevent a hole from forming where the new stitch is created.
The newly formed stitch is slanted to the left:
Increases from a stitch of the previous row
There are two main techniques for making this type of increase (common to both is that the increase is formed from the stitch of the previous row):
1) LIFTED INCREASES -creating the increase from the leg of the stitch in the previous row
2) KNIT 1 BELOW INCREASES – creating the increase from the center of the stitch in the previous row.
LIFTED INCREASE
right lifted increase (RLI)
left lifted increase (LLI)
And in more detail:
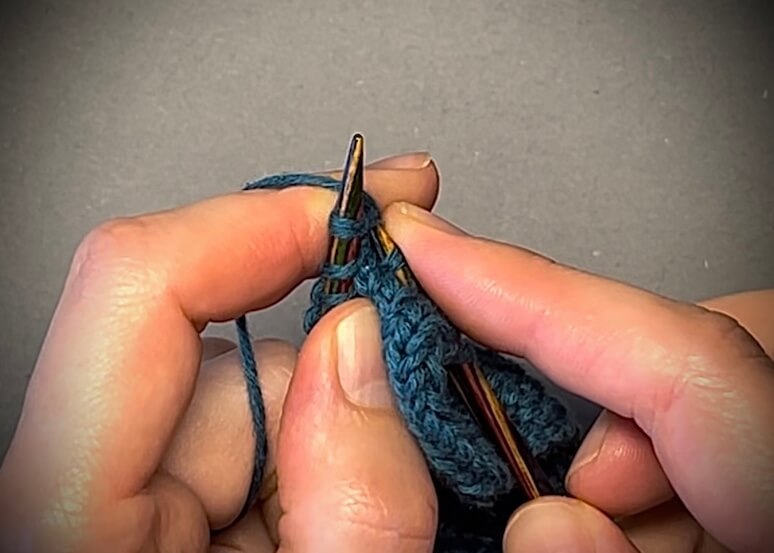
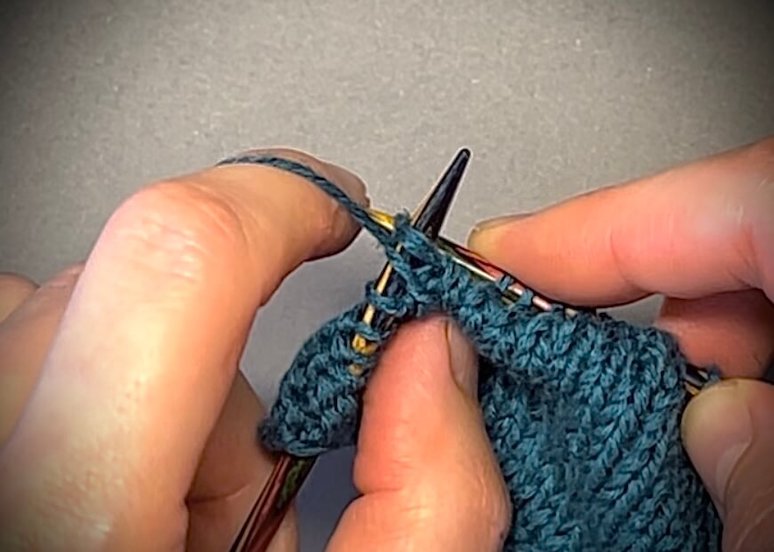
Right lifted increase (RLI)
Insert the right needle under the right leg of the stitch from the previous row as if to knit and knit it.
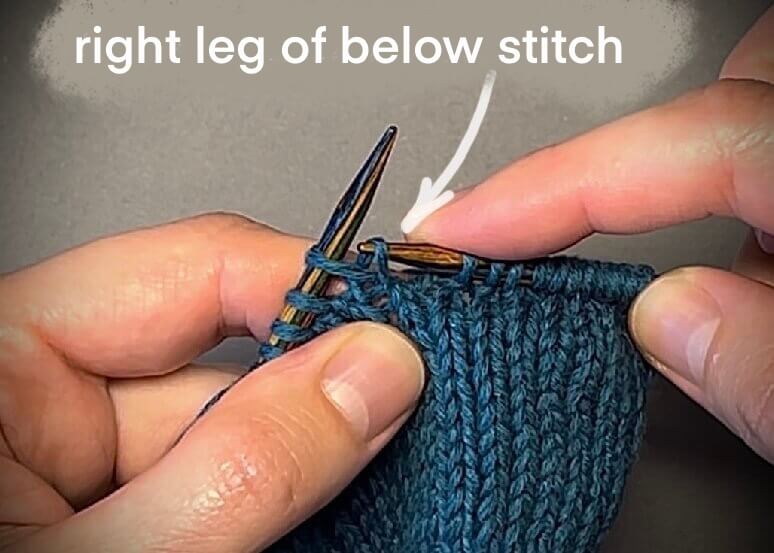
Then knit the stitch of the last row in the usual manner.
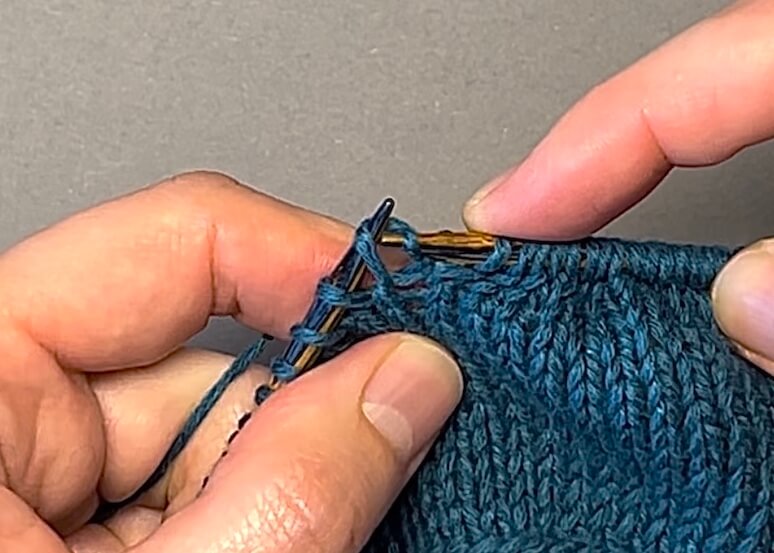
The new stitch is positioned to the right of the desired stitch:
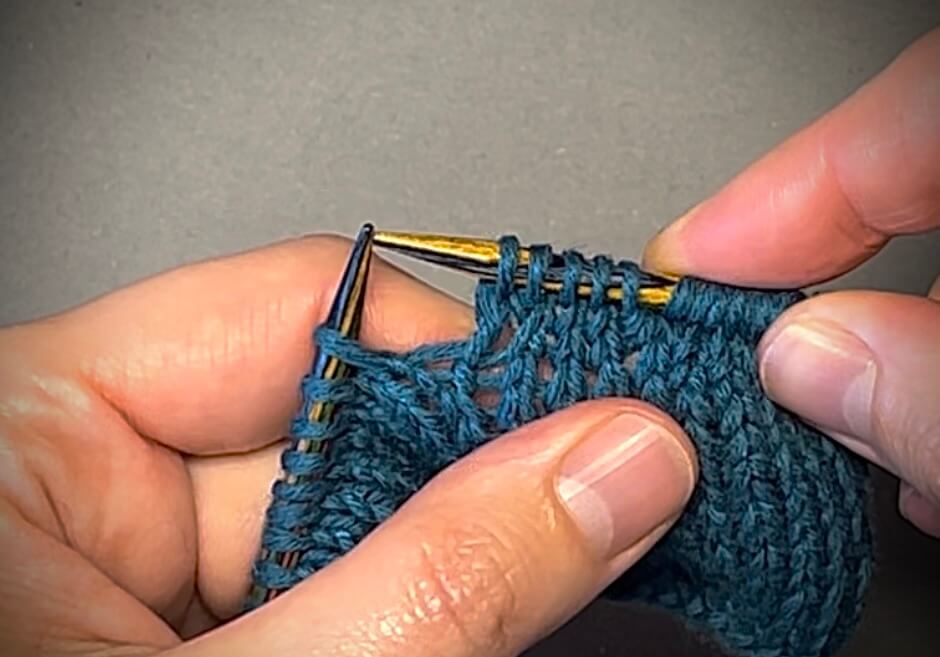
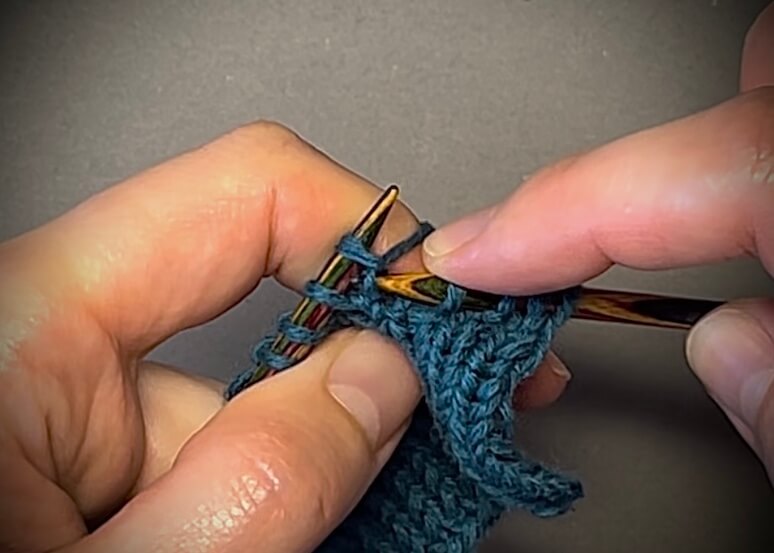
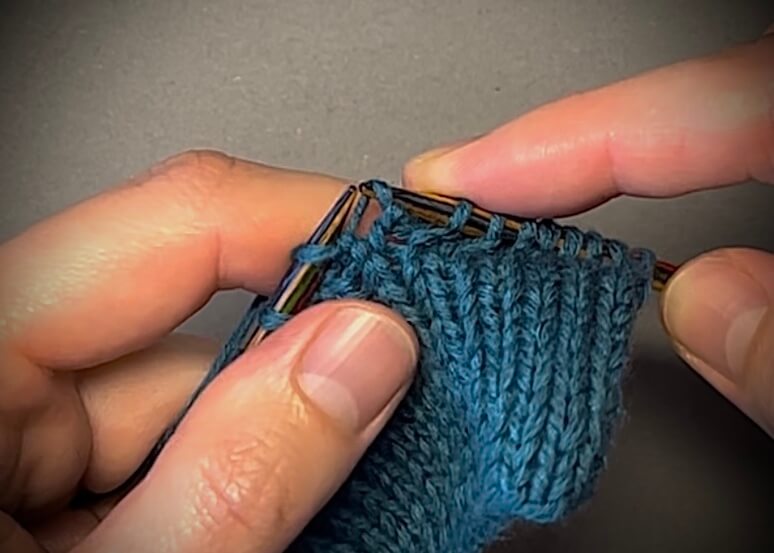
Left lifted increase (LLI)
To create an LLI, first knit the desired stitch in the usual manner.
Then insert the right needle under the left leg of the stitch from the previous row and knit it. For convenience, you can place it on the left needle.
The new stitch is positioned to the left of the desired stitch:
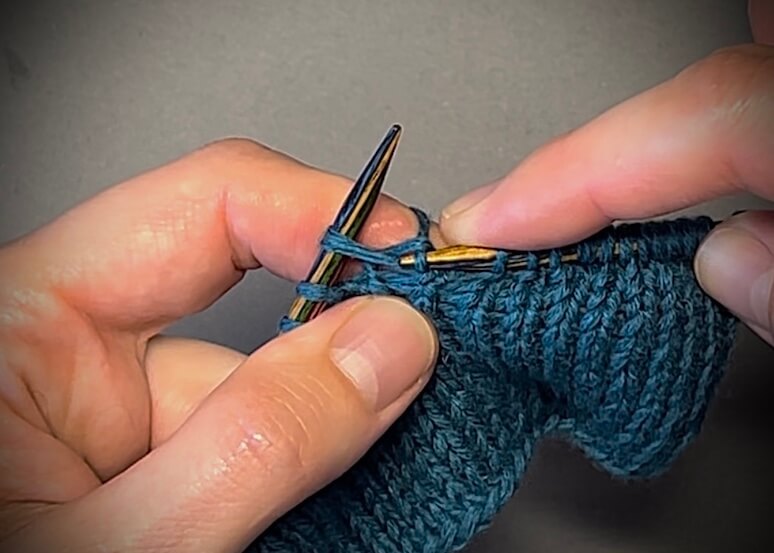
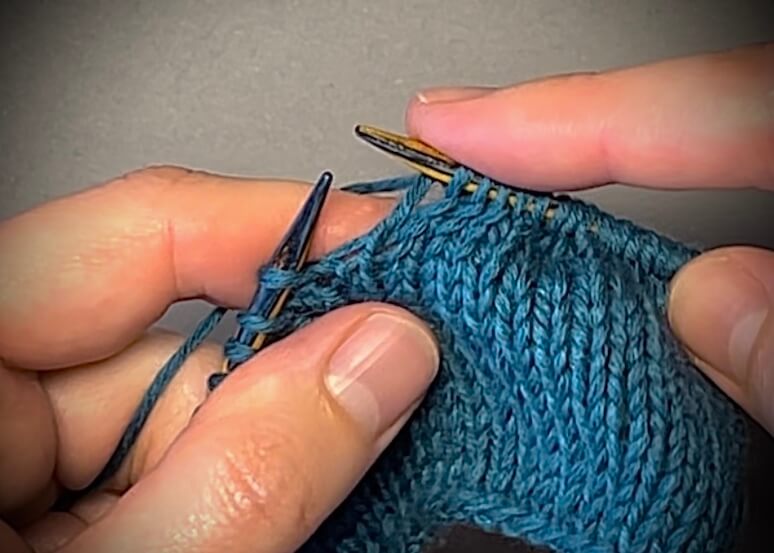
KNIT 1 BELOW INCREASE
Technically, this increase is not categorized as right or left. However, since the appearance of the newly formed stitch differs in the two cases, we’ll divide it into two types for clarity:
Right — an increase made before knitting the main stitch:
Insert the right needle into the center of the stitch in the previous row as if to knit and knit it, then knit the stitch of the last row in the usual manner – the new stitch is positioned to the right of the desired stitch:
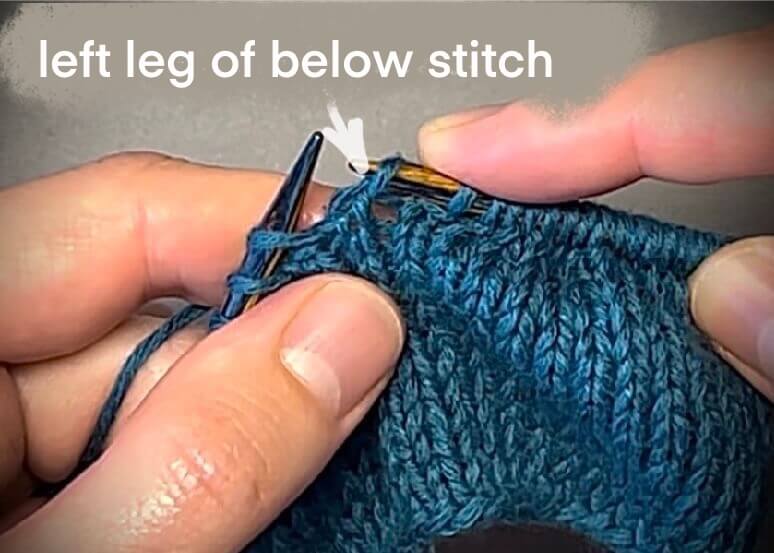
Left — an increase made after knitting the main stitch:
First knit the desired stitch in the usual manner, then insert the right needle into the center of the stitch in the previous row as if to knit directly below the stitch you just knitted and knit it – the new stitch is positioned to the left of the desired stitch:
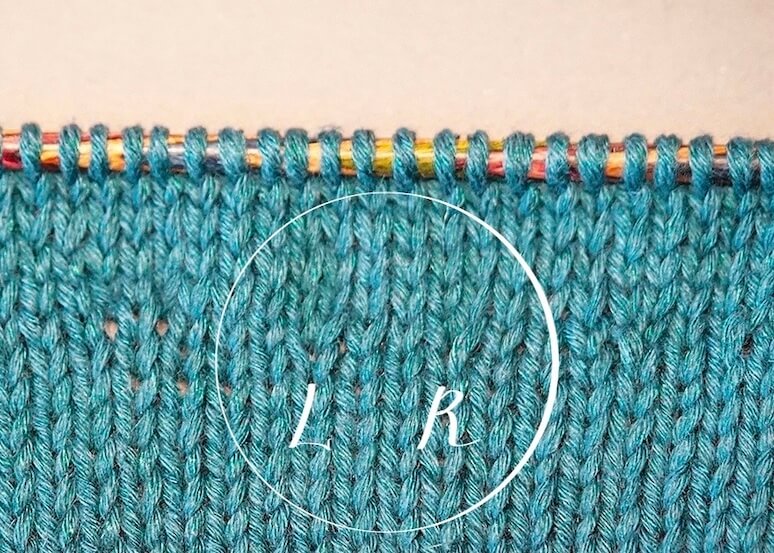
in the purl row:
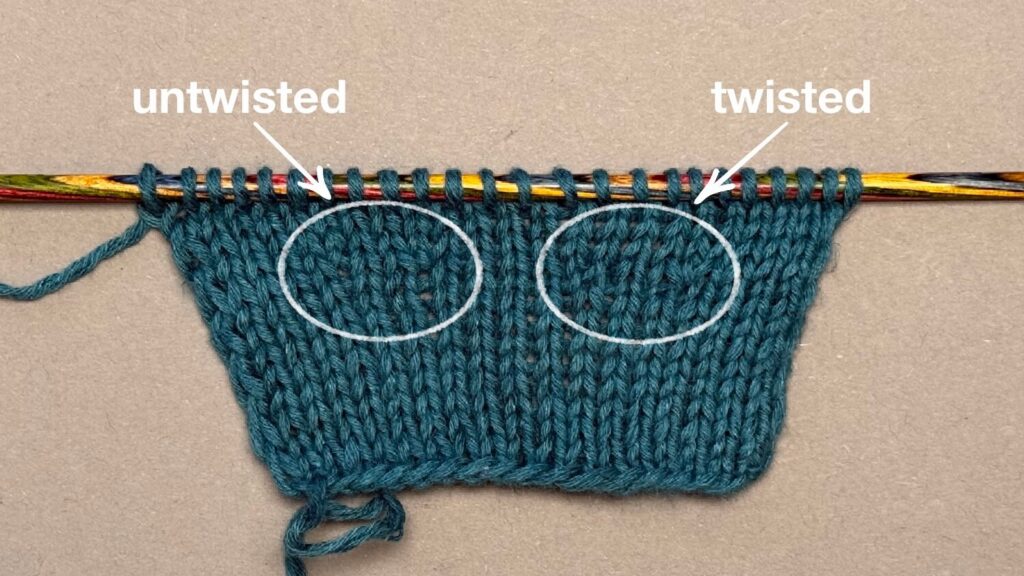
There are 2 types of increases from the stitch of the previous row in the purl row – untwisted and twisted.
The untwisted increases are identical in appearance to increases made from the stitch of the previous row in a knit row. They are slightly looser.
The twisted increases, on the other hand, look more similar to increases made from a crossed horizontal strand (M1). However, they are tighter.
If it is important for you that the increases in the knit and purl rows look identical, it is better to use uncrossed increases in the purl row.
Untwisted increases:
Right-leaning
Pick up the next stitch of the previous row with the right needle and place it onto the left needle with the right leg forward.
Purl this stitch. Then purl the same stitch of the current row.
Left-leaning
Pick up the same stitch of the previous row with the left needle from bottom to top and place it onto the left needle with the right leg forward. Purl this stitch.
Twisted increases:
Right-leaning
Pick up the next stitch of the previous row with the right needle and place it onto the left needle with the left leg forward. Purl it through the front loop.
Left-leaning
Pick up the same stitch of the previous row with the left needle from top to bottom and place it onto the left needle with the left leg forward. Purl it through the front loop.
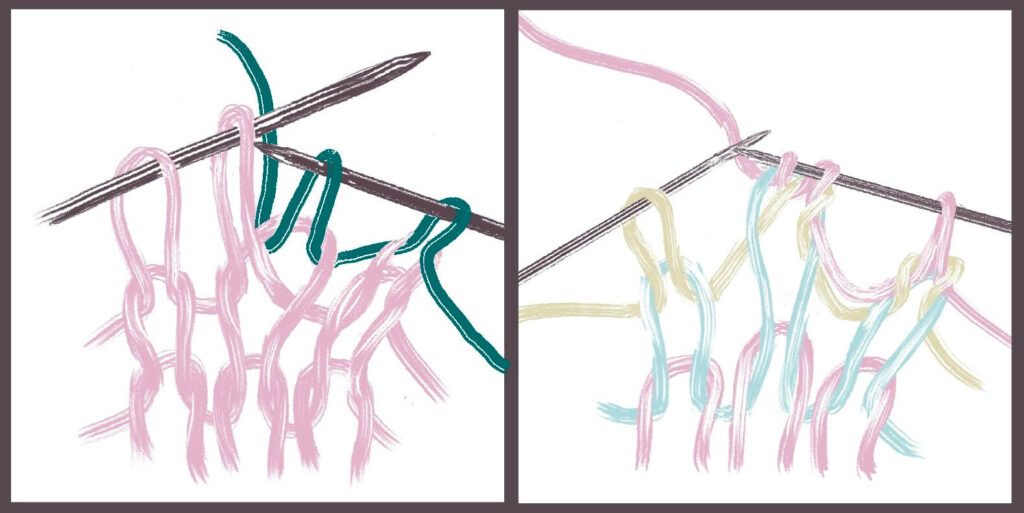
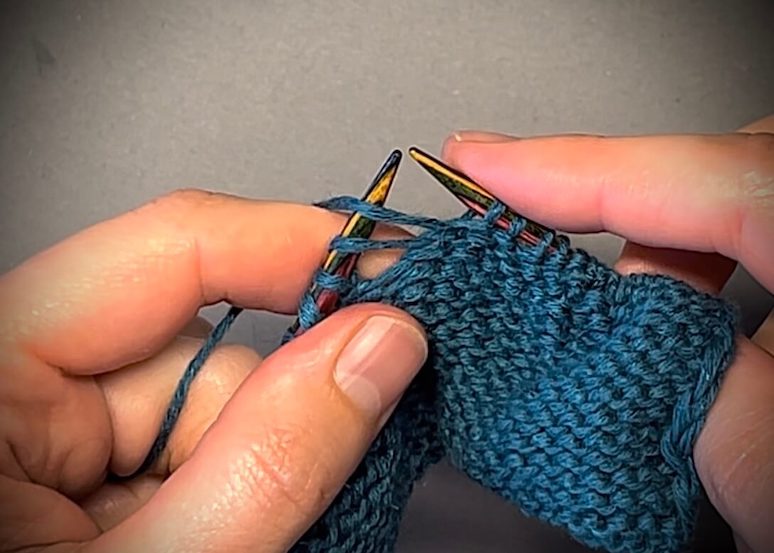
Yarn over increases
Now let’s talk about increases using yarn overs. Yarn overs are created in one row and worked in the next. ⏰ 02:47 – in video
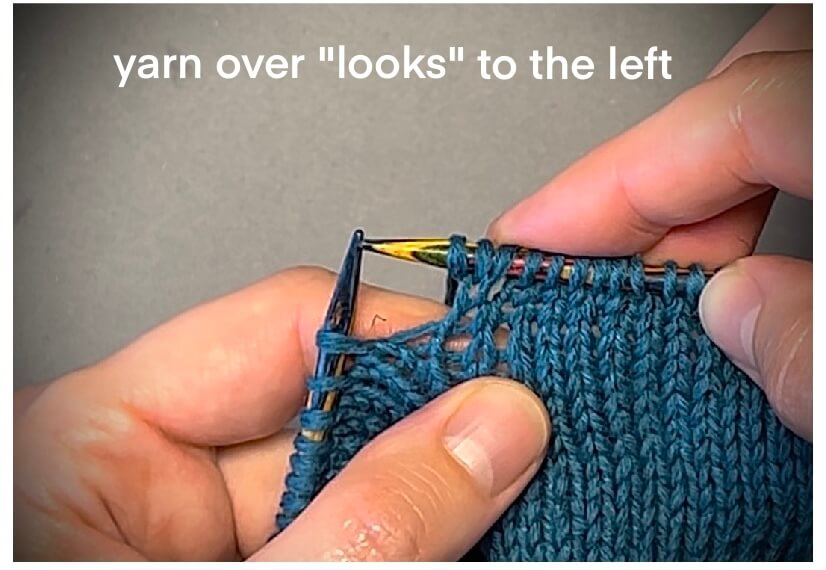
To get a stitch that leans to the right, in a knit row, make a yarn over by placing the working yarn on the right needle with the left loop forward. It’s easy to remember: the yarn over “looks” to the right:
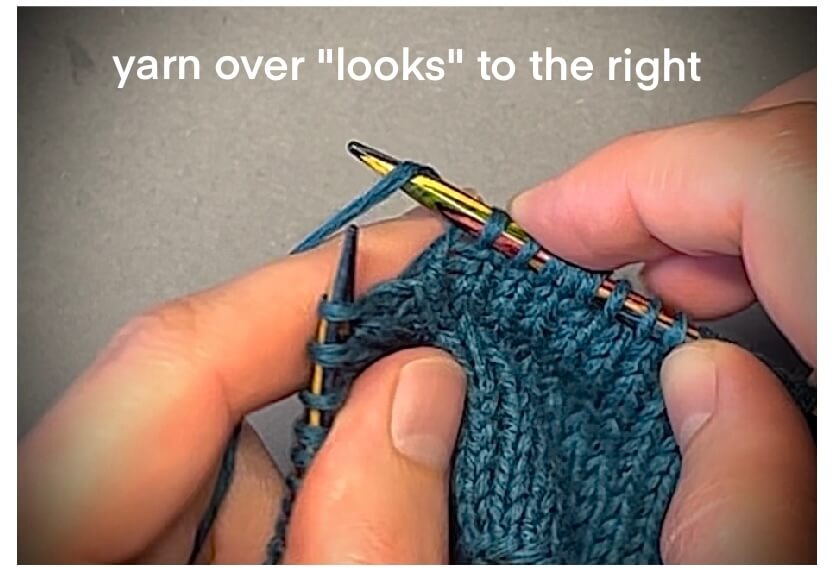
Then knit the next stitch as usual:
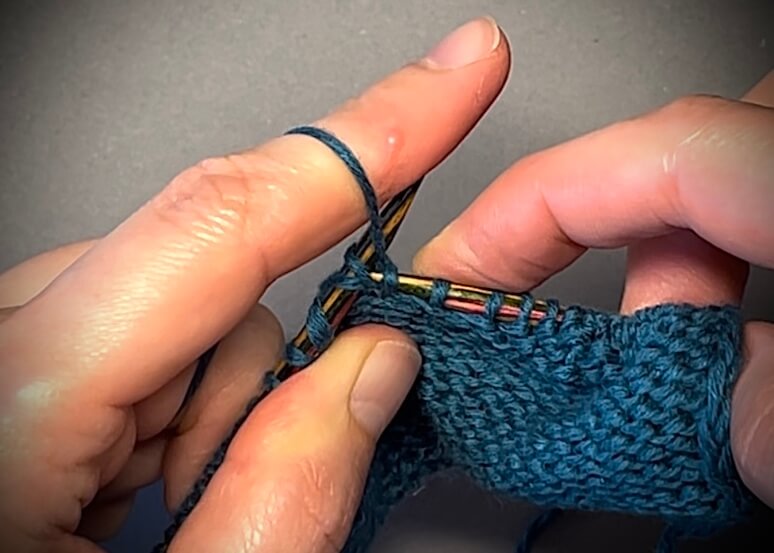
To get a stitch that leans to the left, in a knit row, make a yarn over by placing the working yarn on the right needle with the right loop forward, then knit the next stitches as usual.
When it’s time to work the yarn overs in the purl row (if knitting back-and-forth), each yarn over should be worked twisted.
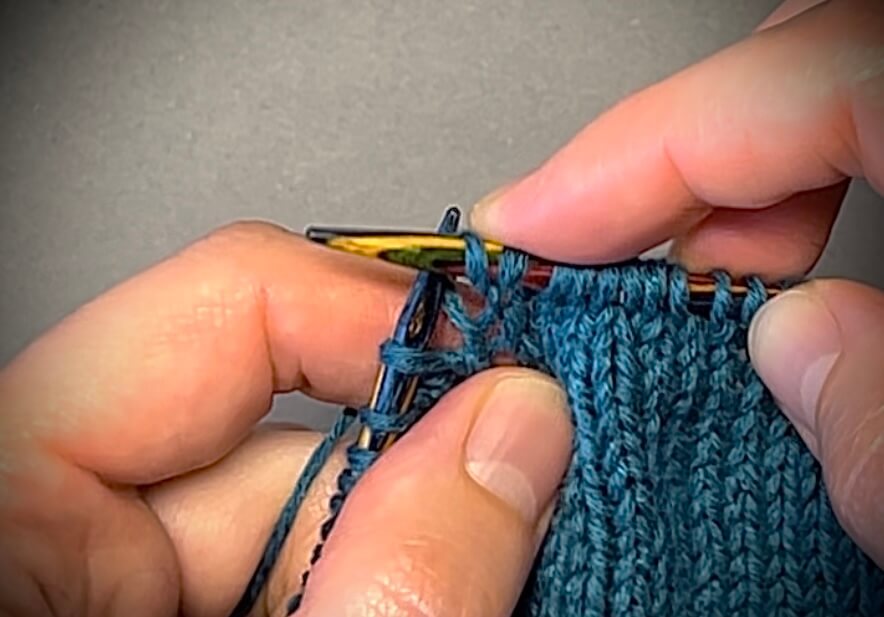
For purl stitches: Insert the right needle behind the knitting, under the left loop of the yarn over, directing the needle from left to right, and purl the yarn over.
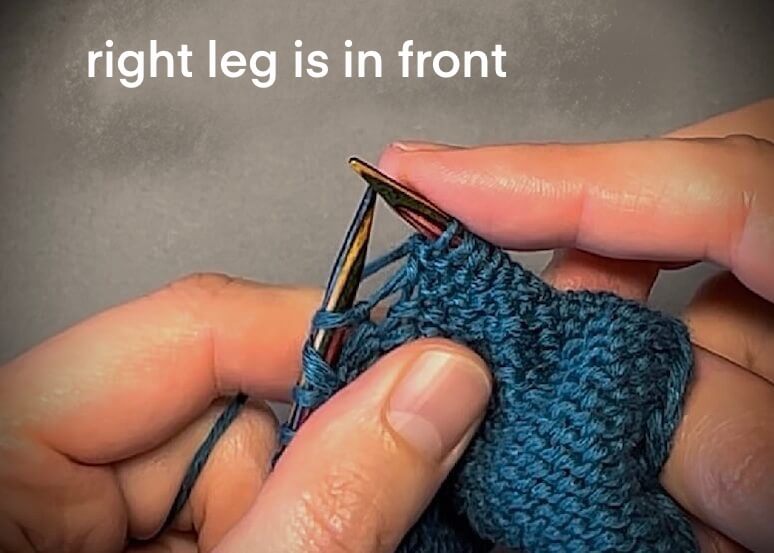
Don’t forget to turn the resulting stitch so that the right loop of it is in front. Purl stitches are knitted in the usual way.
When working a yarn over that should become a right-leaning increase in the knit row, insert the right needle under the left loop of the yarn over in front of the knitting and purl it.
The result should be the following picture in the right and wrong side rows:
Continue knitting the purl row.
If knitting in the round, work the yarn overs in the next row the same way as when working crossed strands.
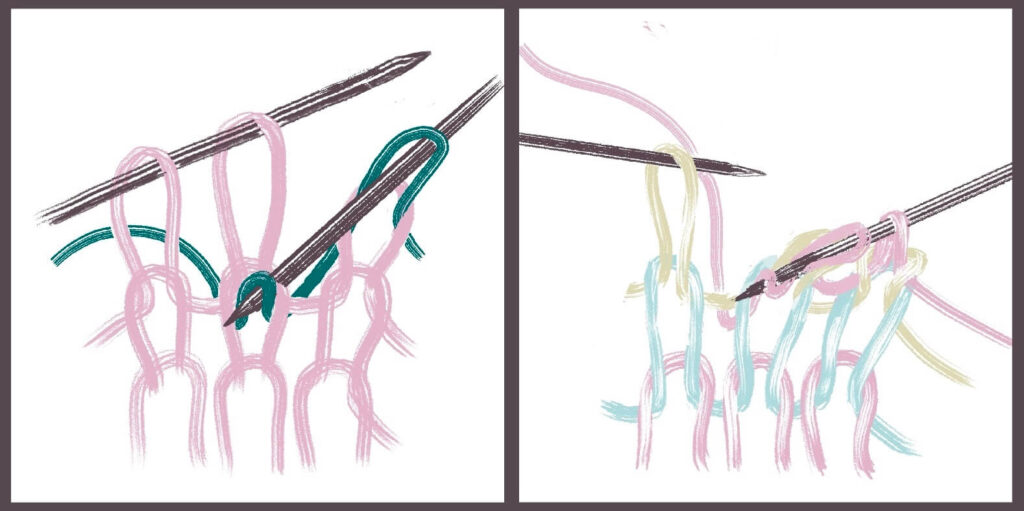
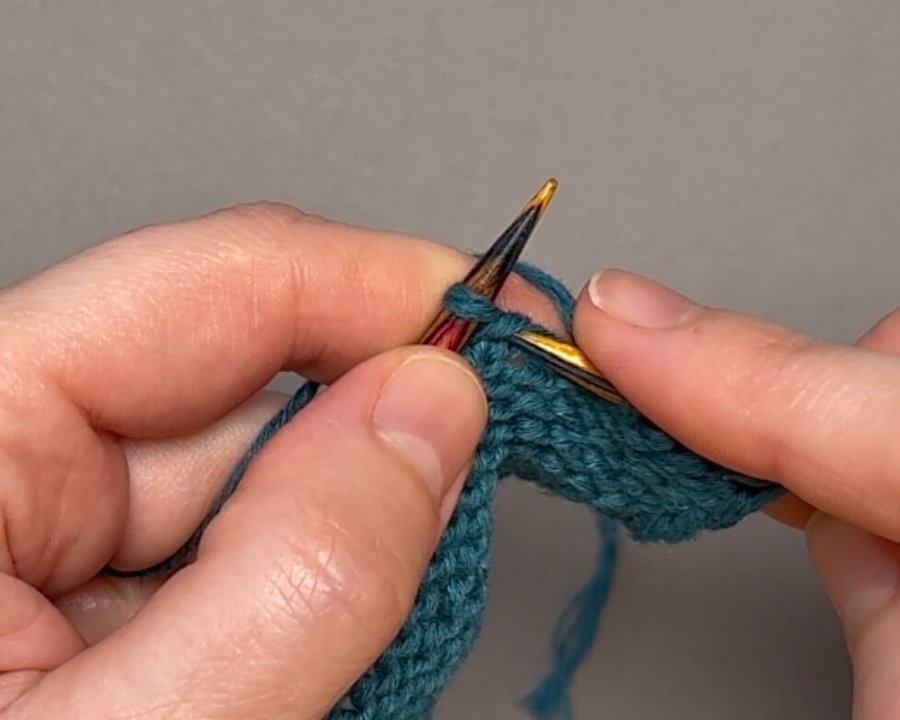
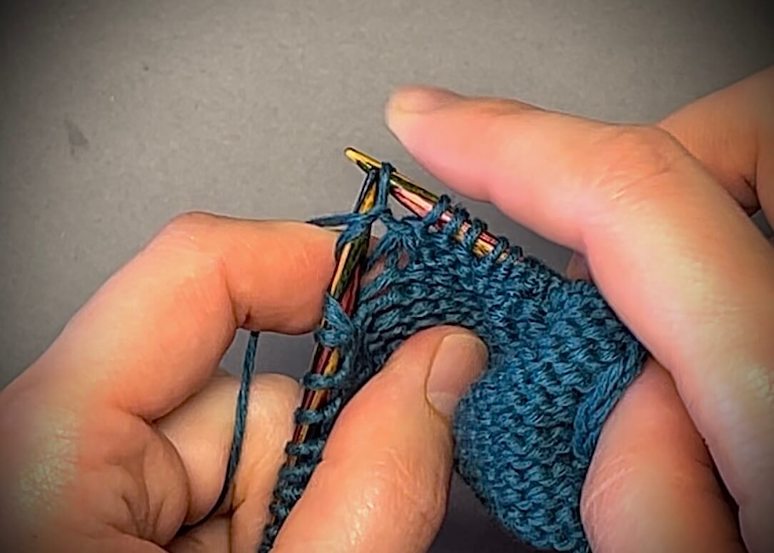
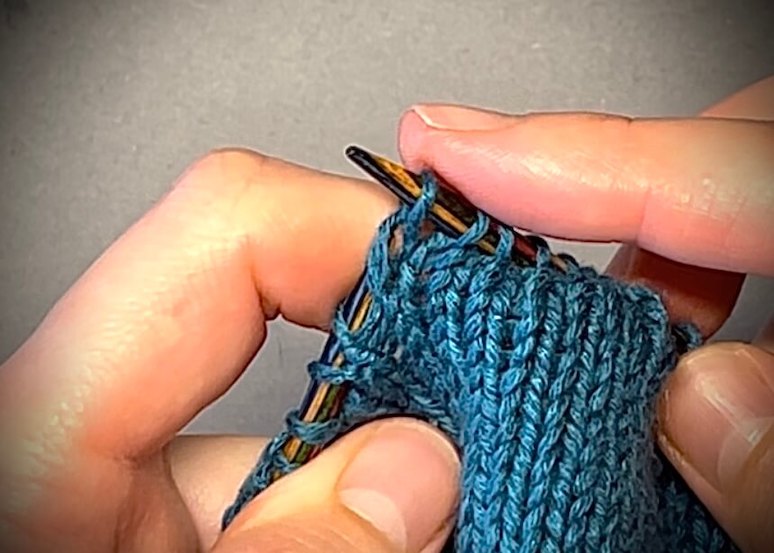
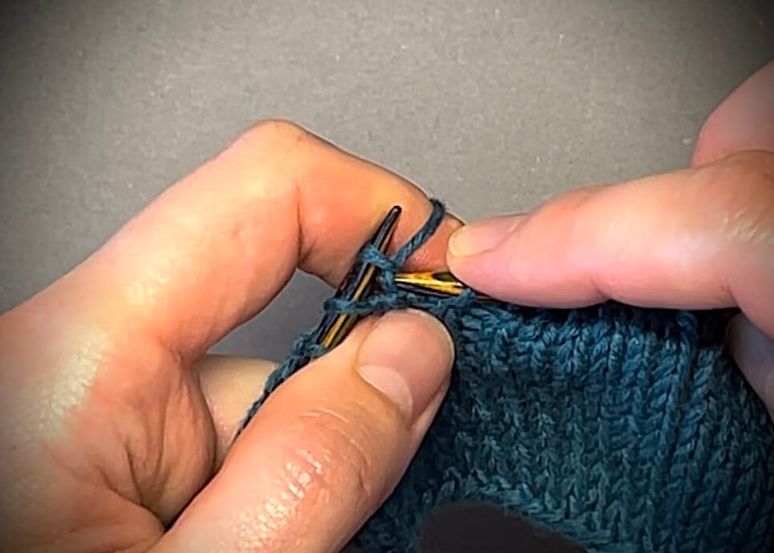
Twincrease
Now let’s look at another type of increase, which is very interesting and modern, invented recently by @assia.brill — Twincrease. ⏰ 04:17 – in video
This method creates two stitches from one, which are visually indistinguishable from each other.
Insert the right needle into the desired stitch as if to purl. Slip it off the left needle and wrap this stitch around the left needle from front to back.
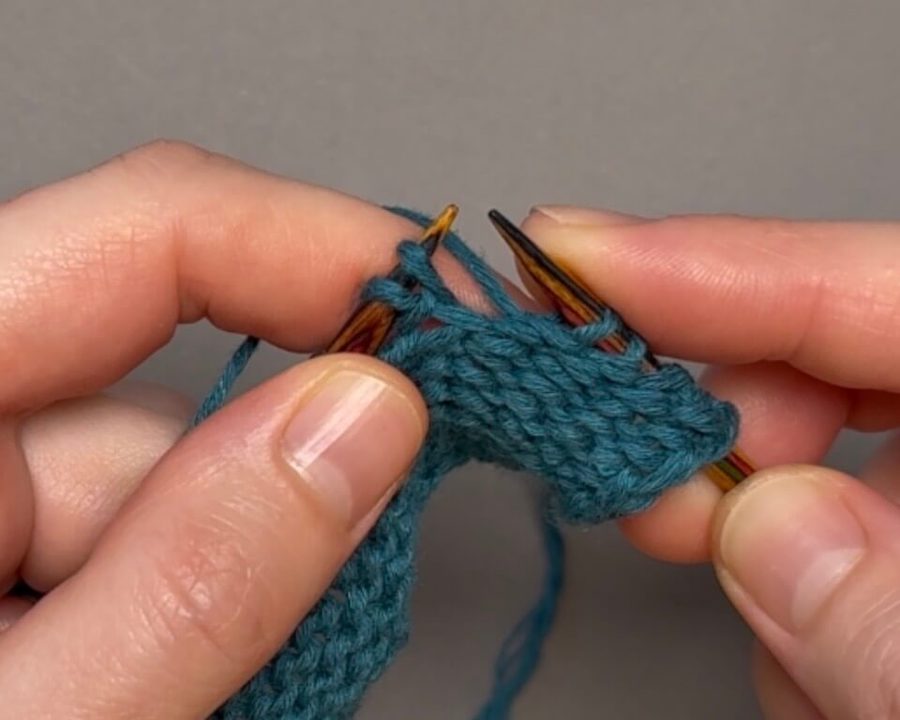
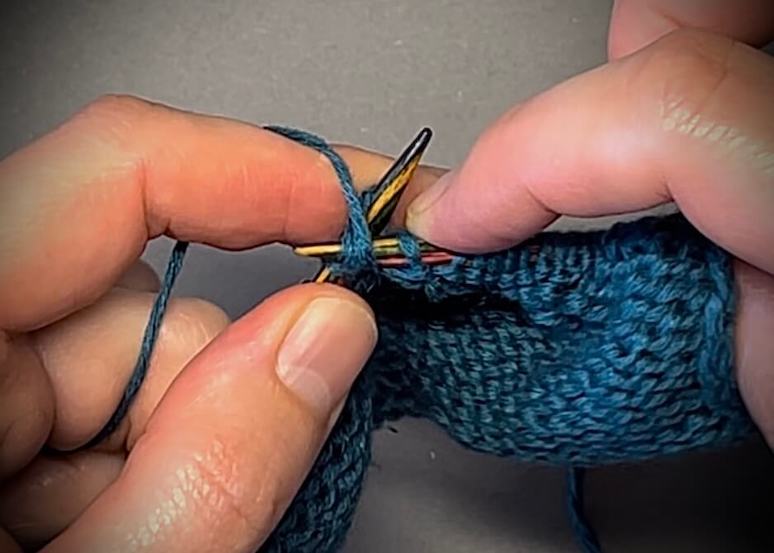
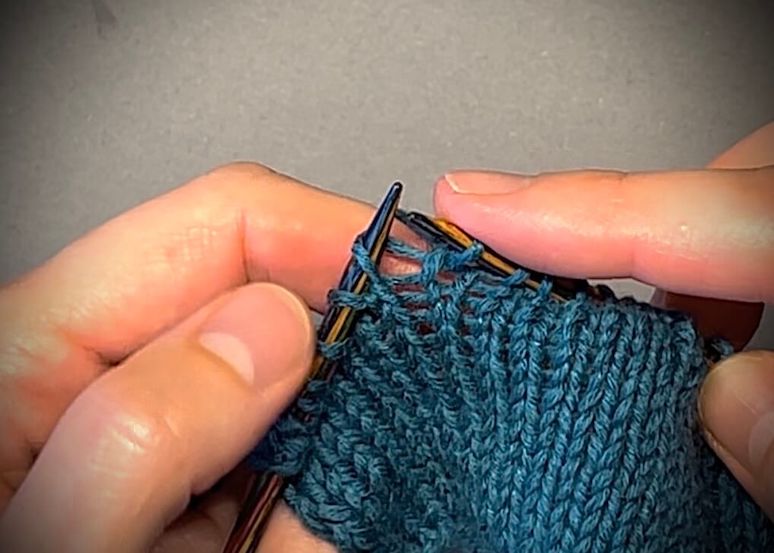
Knit the first stitch from this position and slip only the right loop of the stitch off the needle.
Then insert the right needle under the left loop of the stitch as if to knit.
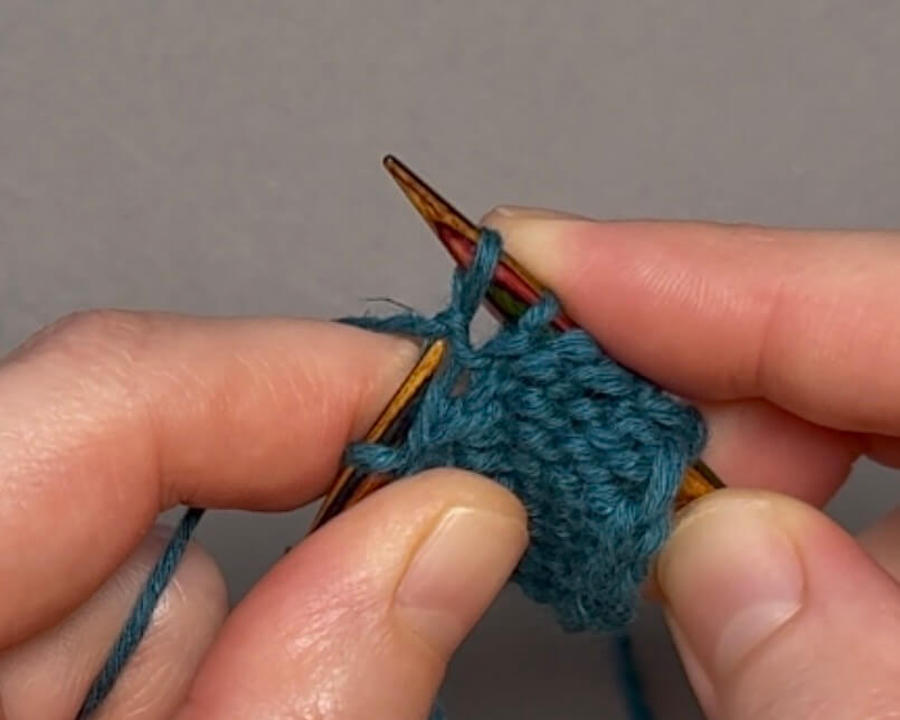
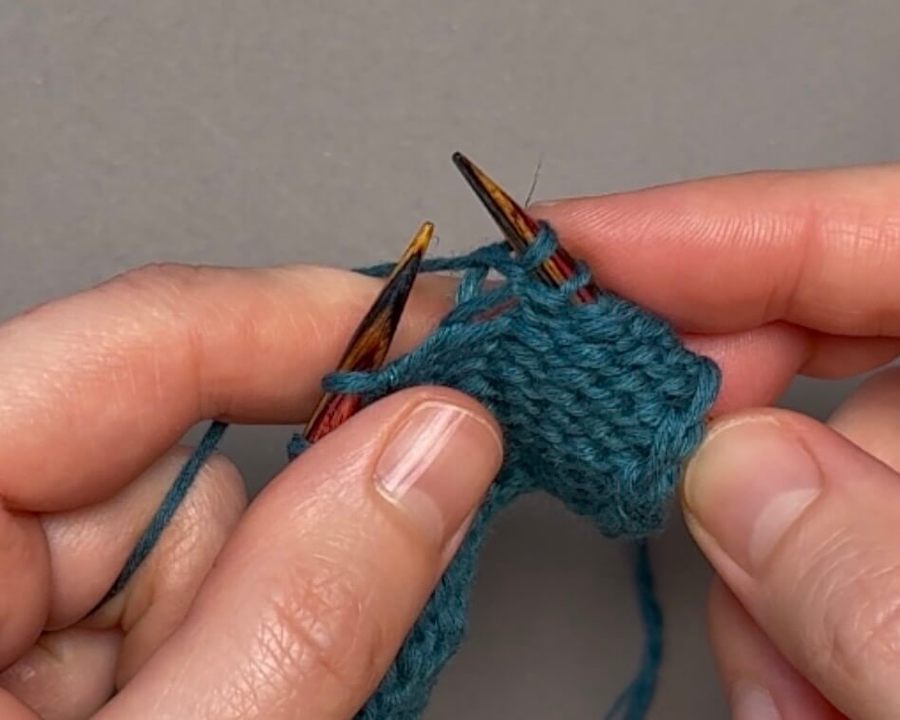
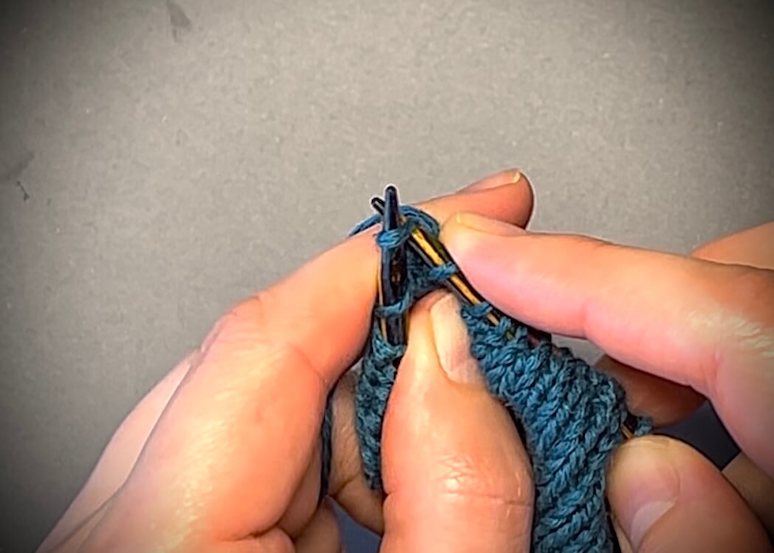
Knit the second stitch from this position. Slip the left loop of the stitch off the left needle.
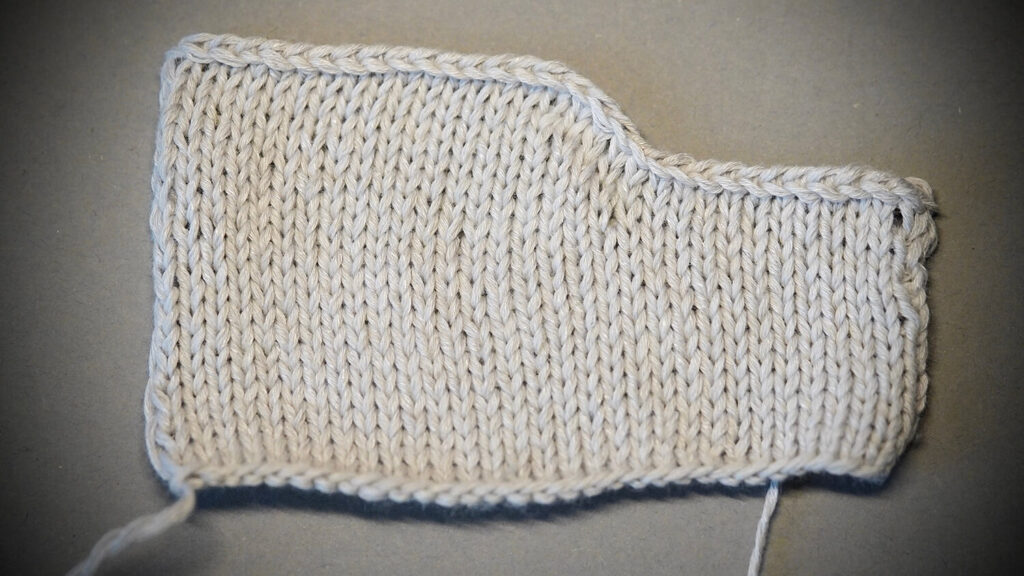
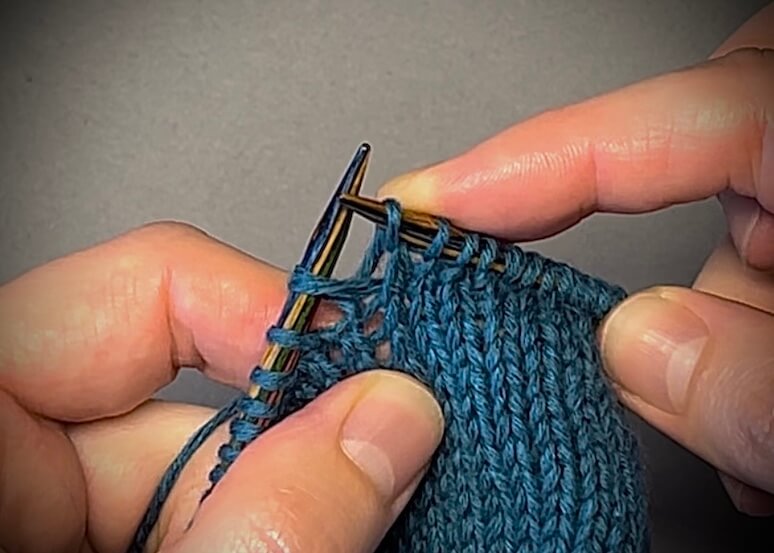
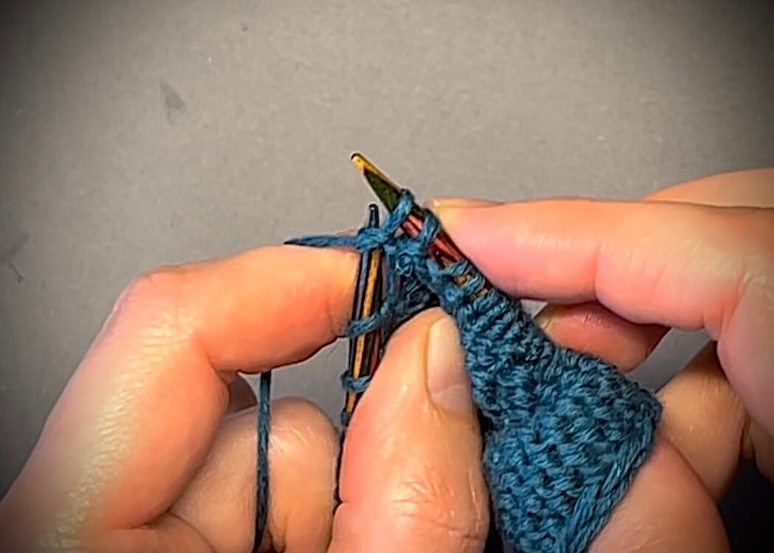
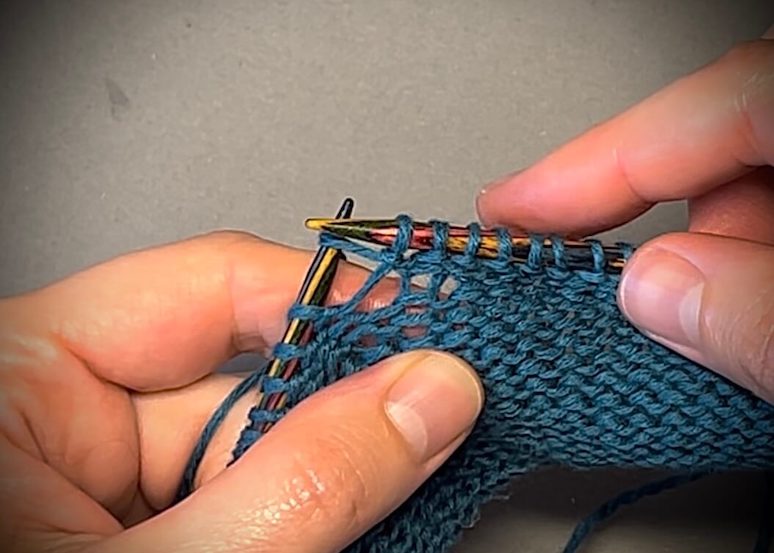
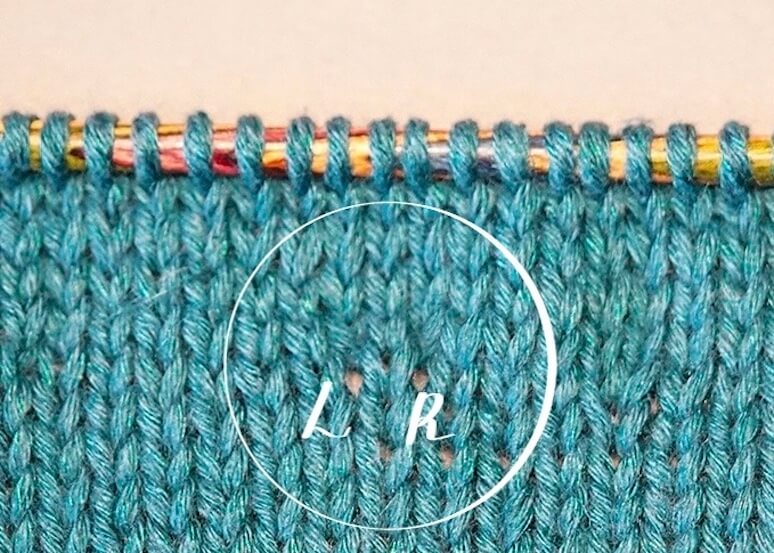
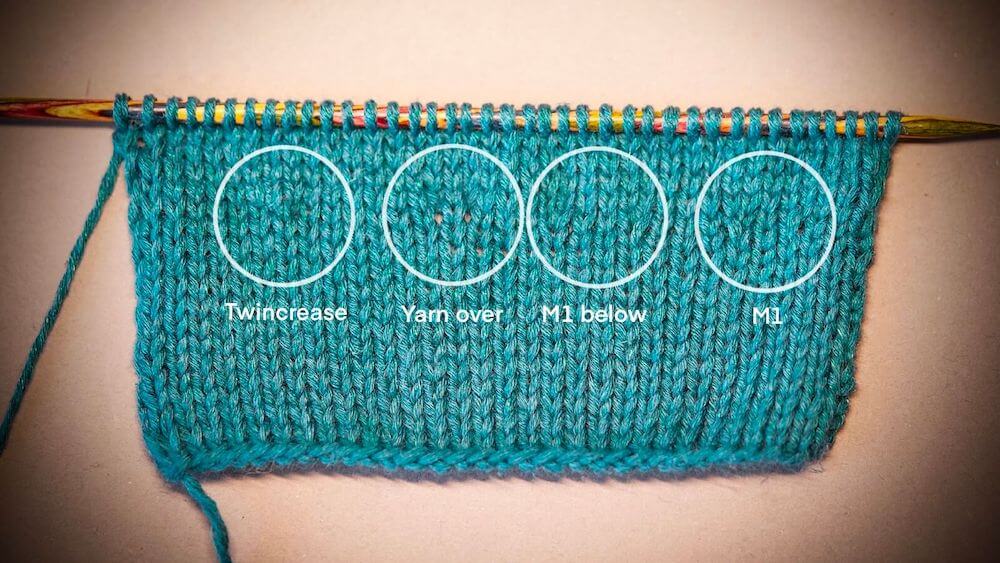
Finally, let’s see how different types of increases look on the finished sample:
I hope this material was helpful and allowed you to easily and quickly master various types of increases. In any case, choosing a method to widen your fabric is creative process, just like any other stage of knitting.
Sincerely, Tatiana.
SHARE